

Set up & use Events
From event type to template to the final event – with daily schedule, tasks, participants, linked bookings, and PDF exports.
Note: You can find the module under In-House → Events. If this menu item is not visible to you, please contact our support team to have the feature enabled.
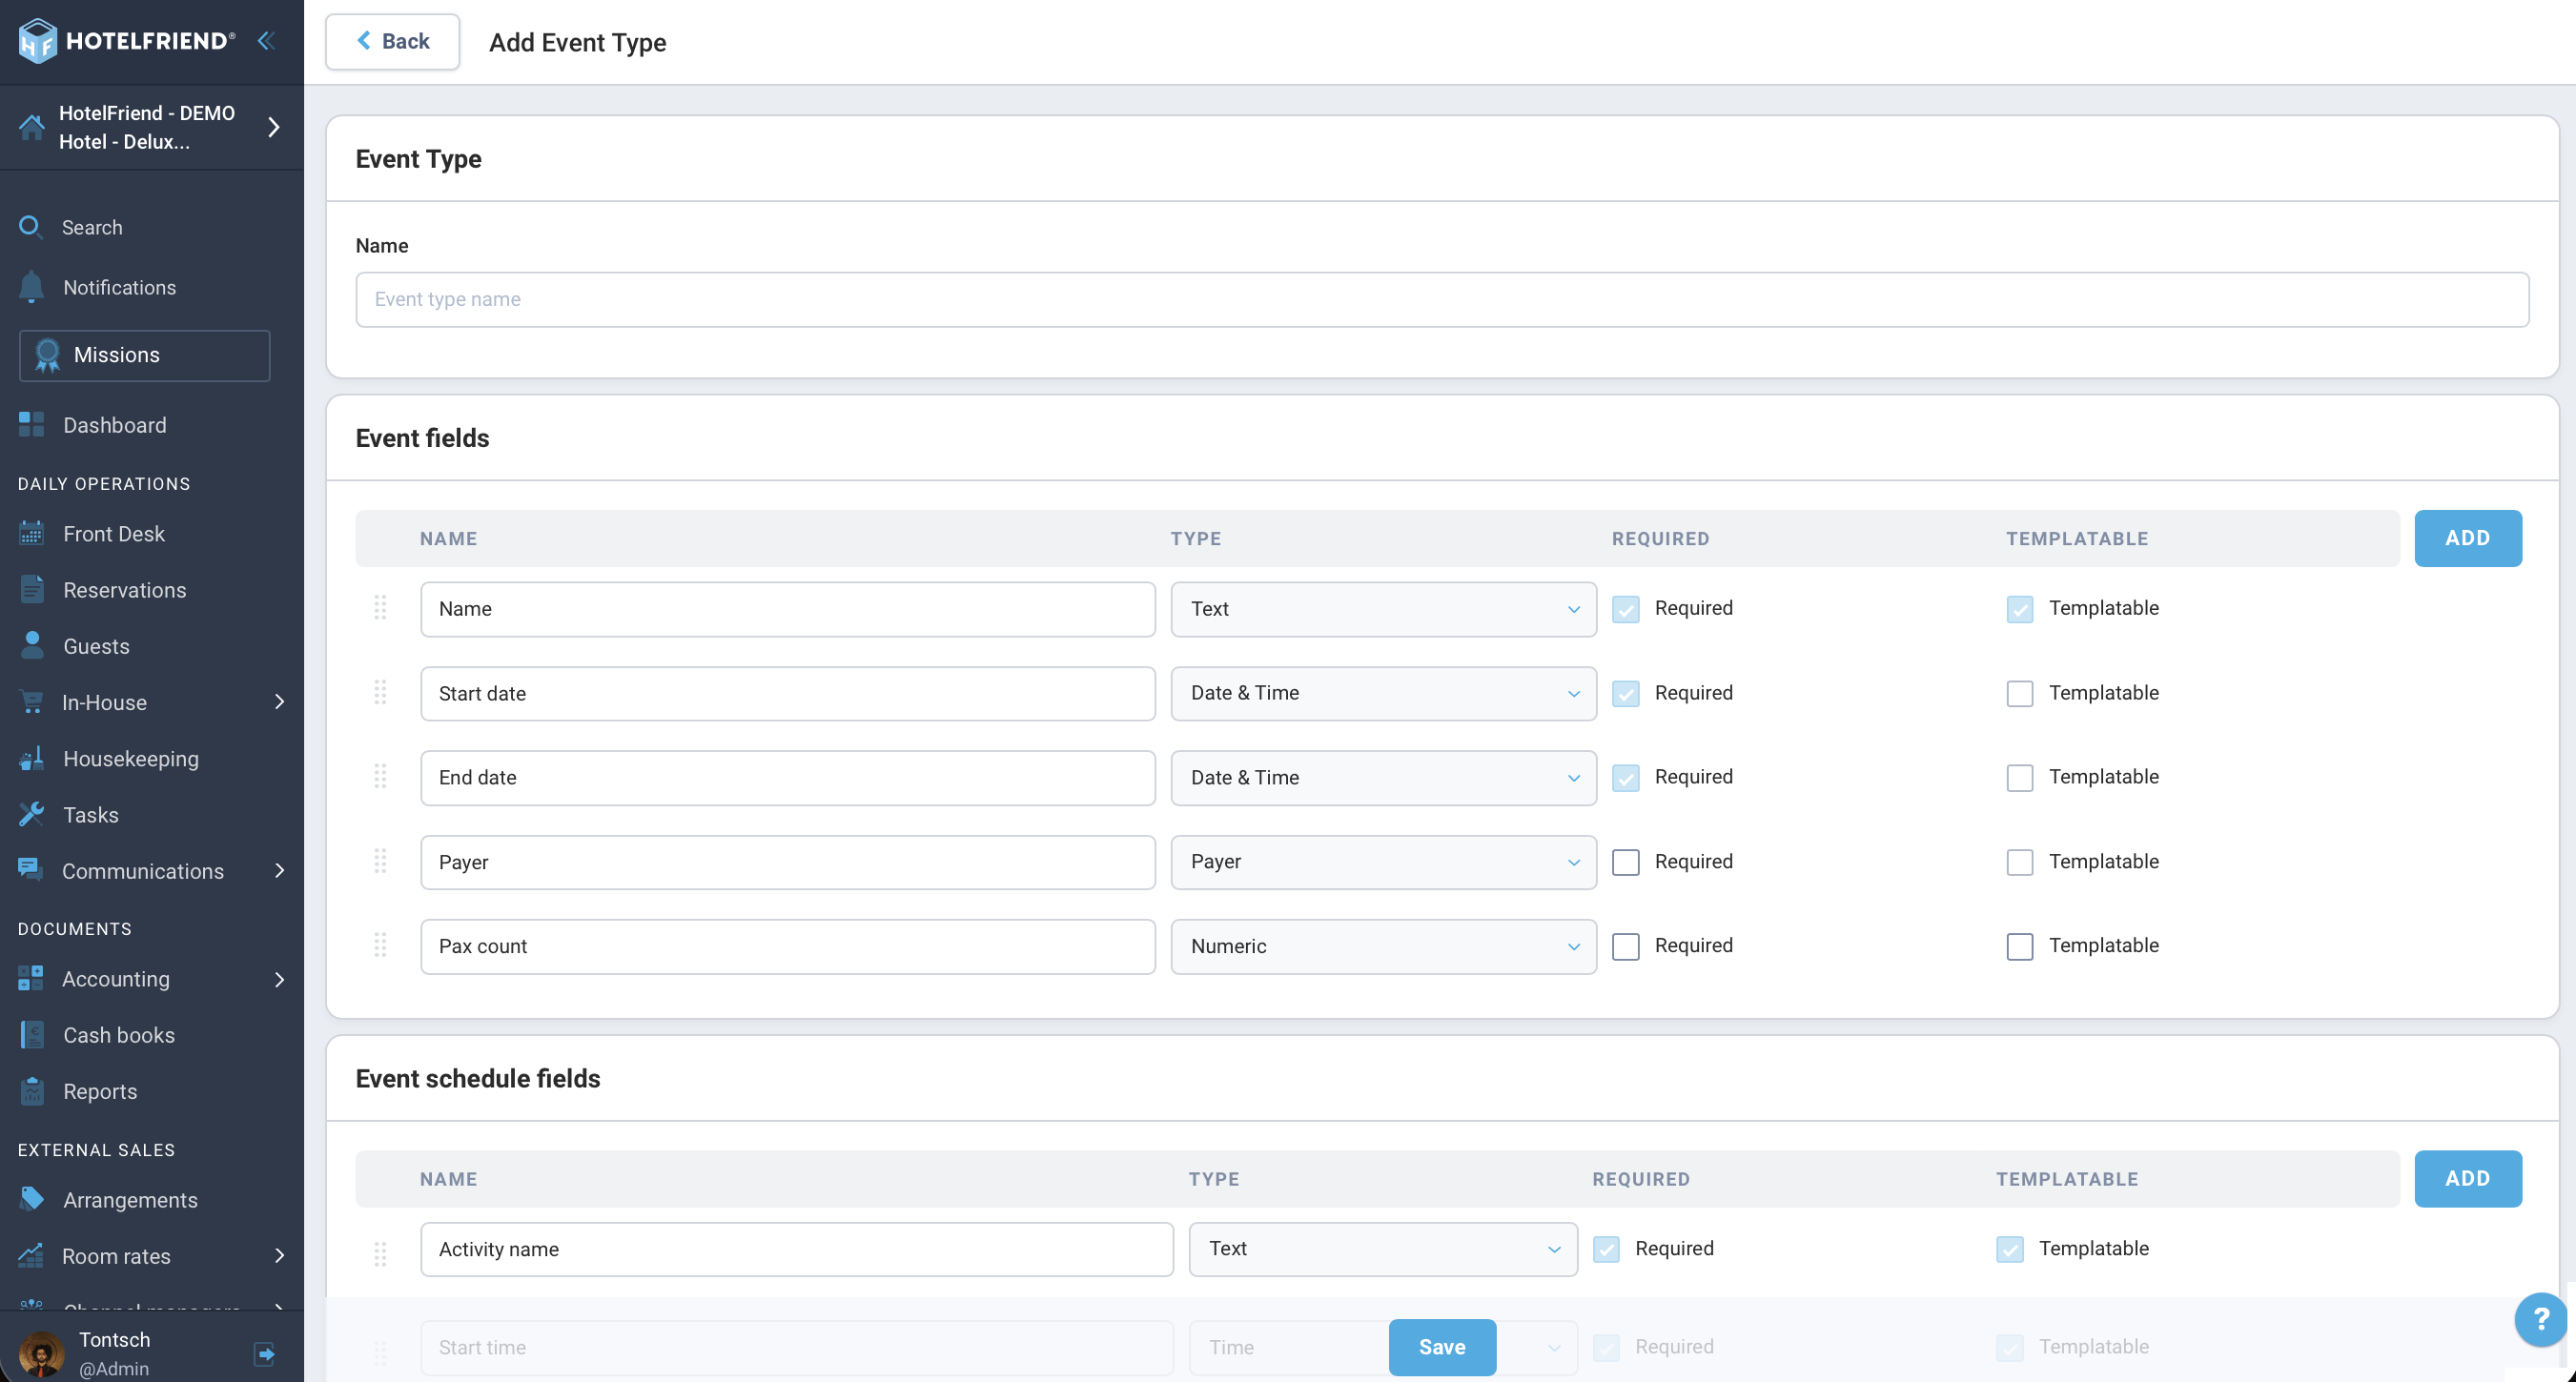
1. Create Event Type (One-time setup)
Defines which fields an event should have.
- Open In-House → Events → Settings.
- Click "Create Event Type".
- Select the fields to be displayed:
- General Info: Location, Accommodation, PAX (Number of participants), Description, Custom Fields
- Daily Schedule Columns: Guests (PAX), Service/Order, Resources, Tasks, Participants, Comment
- Select Time Synchronization:
- Full: Order times automatically adapt to activity times.
- None: Times are independent of each other.
- Save.
Note: The Default Event Type (mandatory fields only) exists automatically and does not need to be created manually.
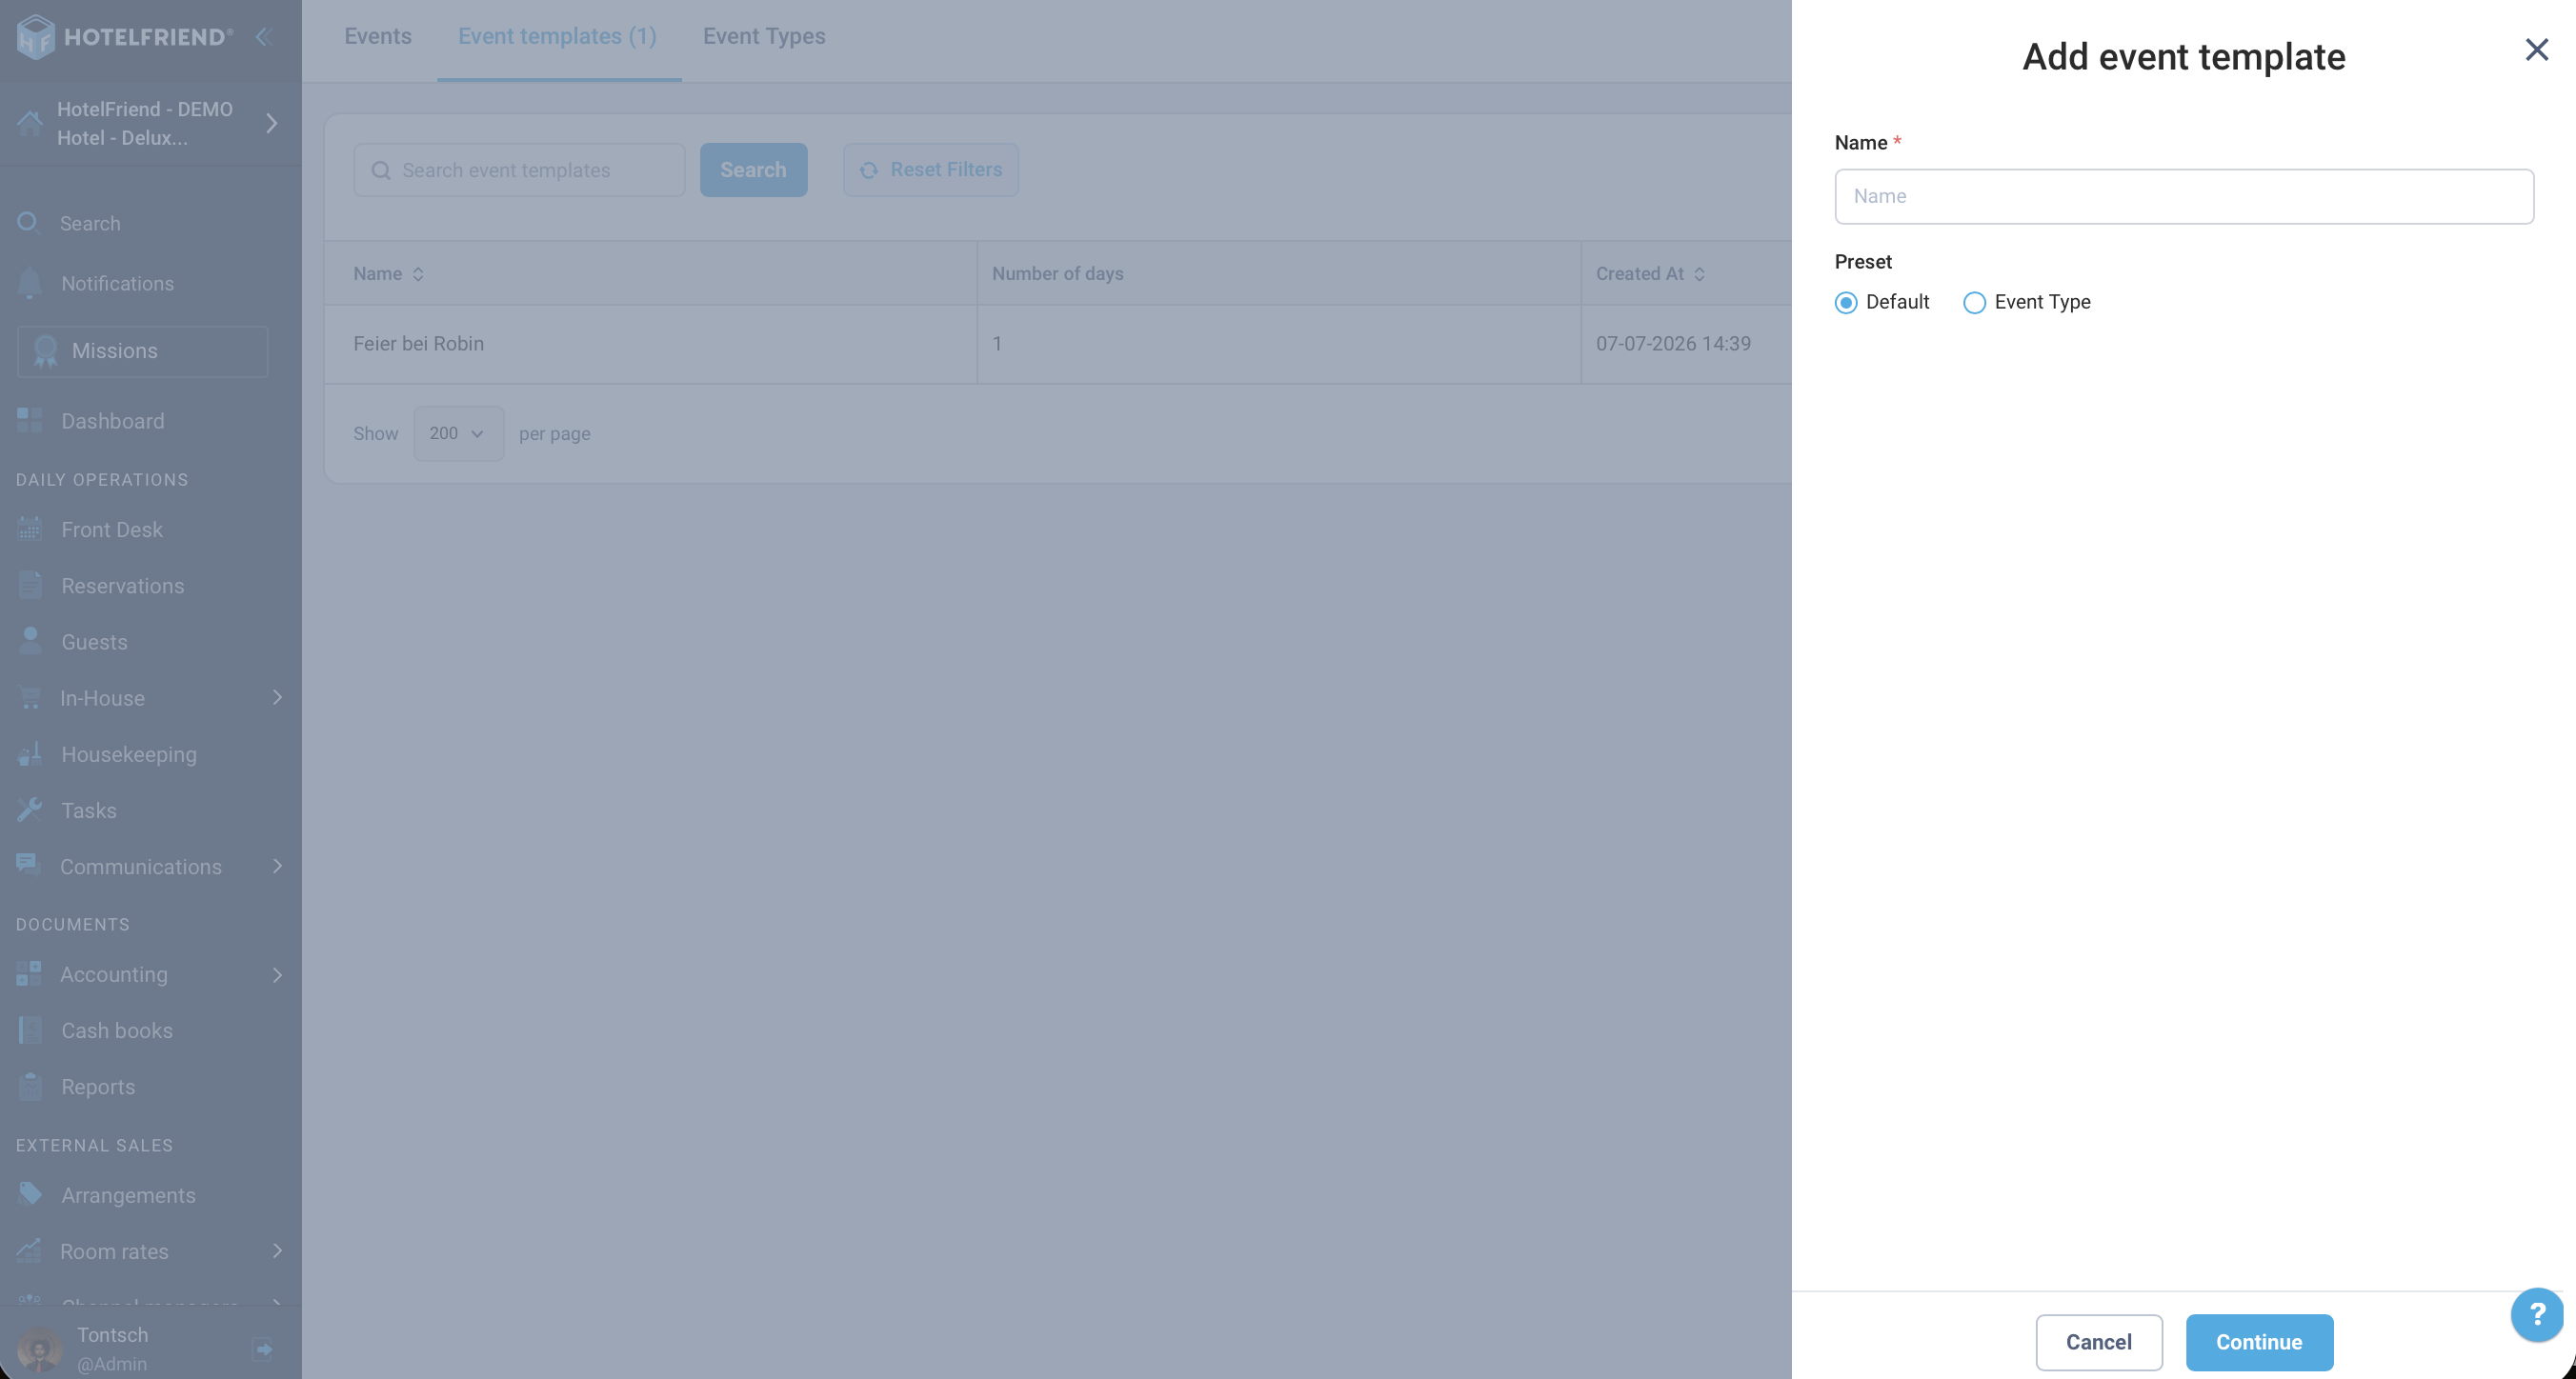
2. Create Event Template (Optional)
Useful if events often follow a similar structure (e.g., Wedding, Conference).
- Go to In-House → Events → Templates → "Create Template".
- Select Event Type – the fields will be inherited.
- Pre-fill the schedule: typical activities, times, departments, tasks.
- Save.
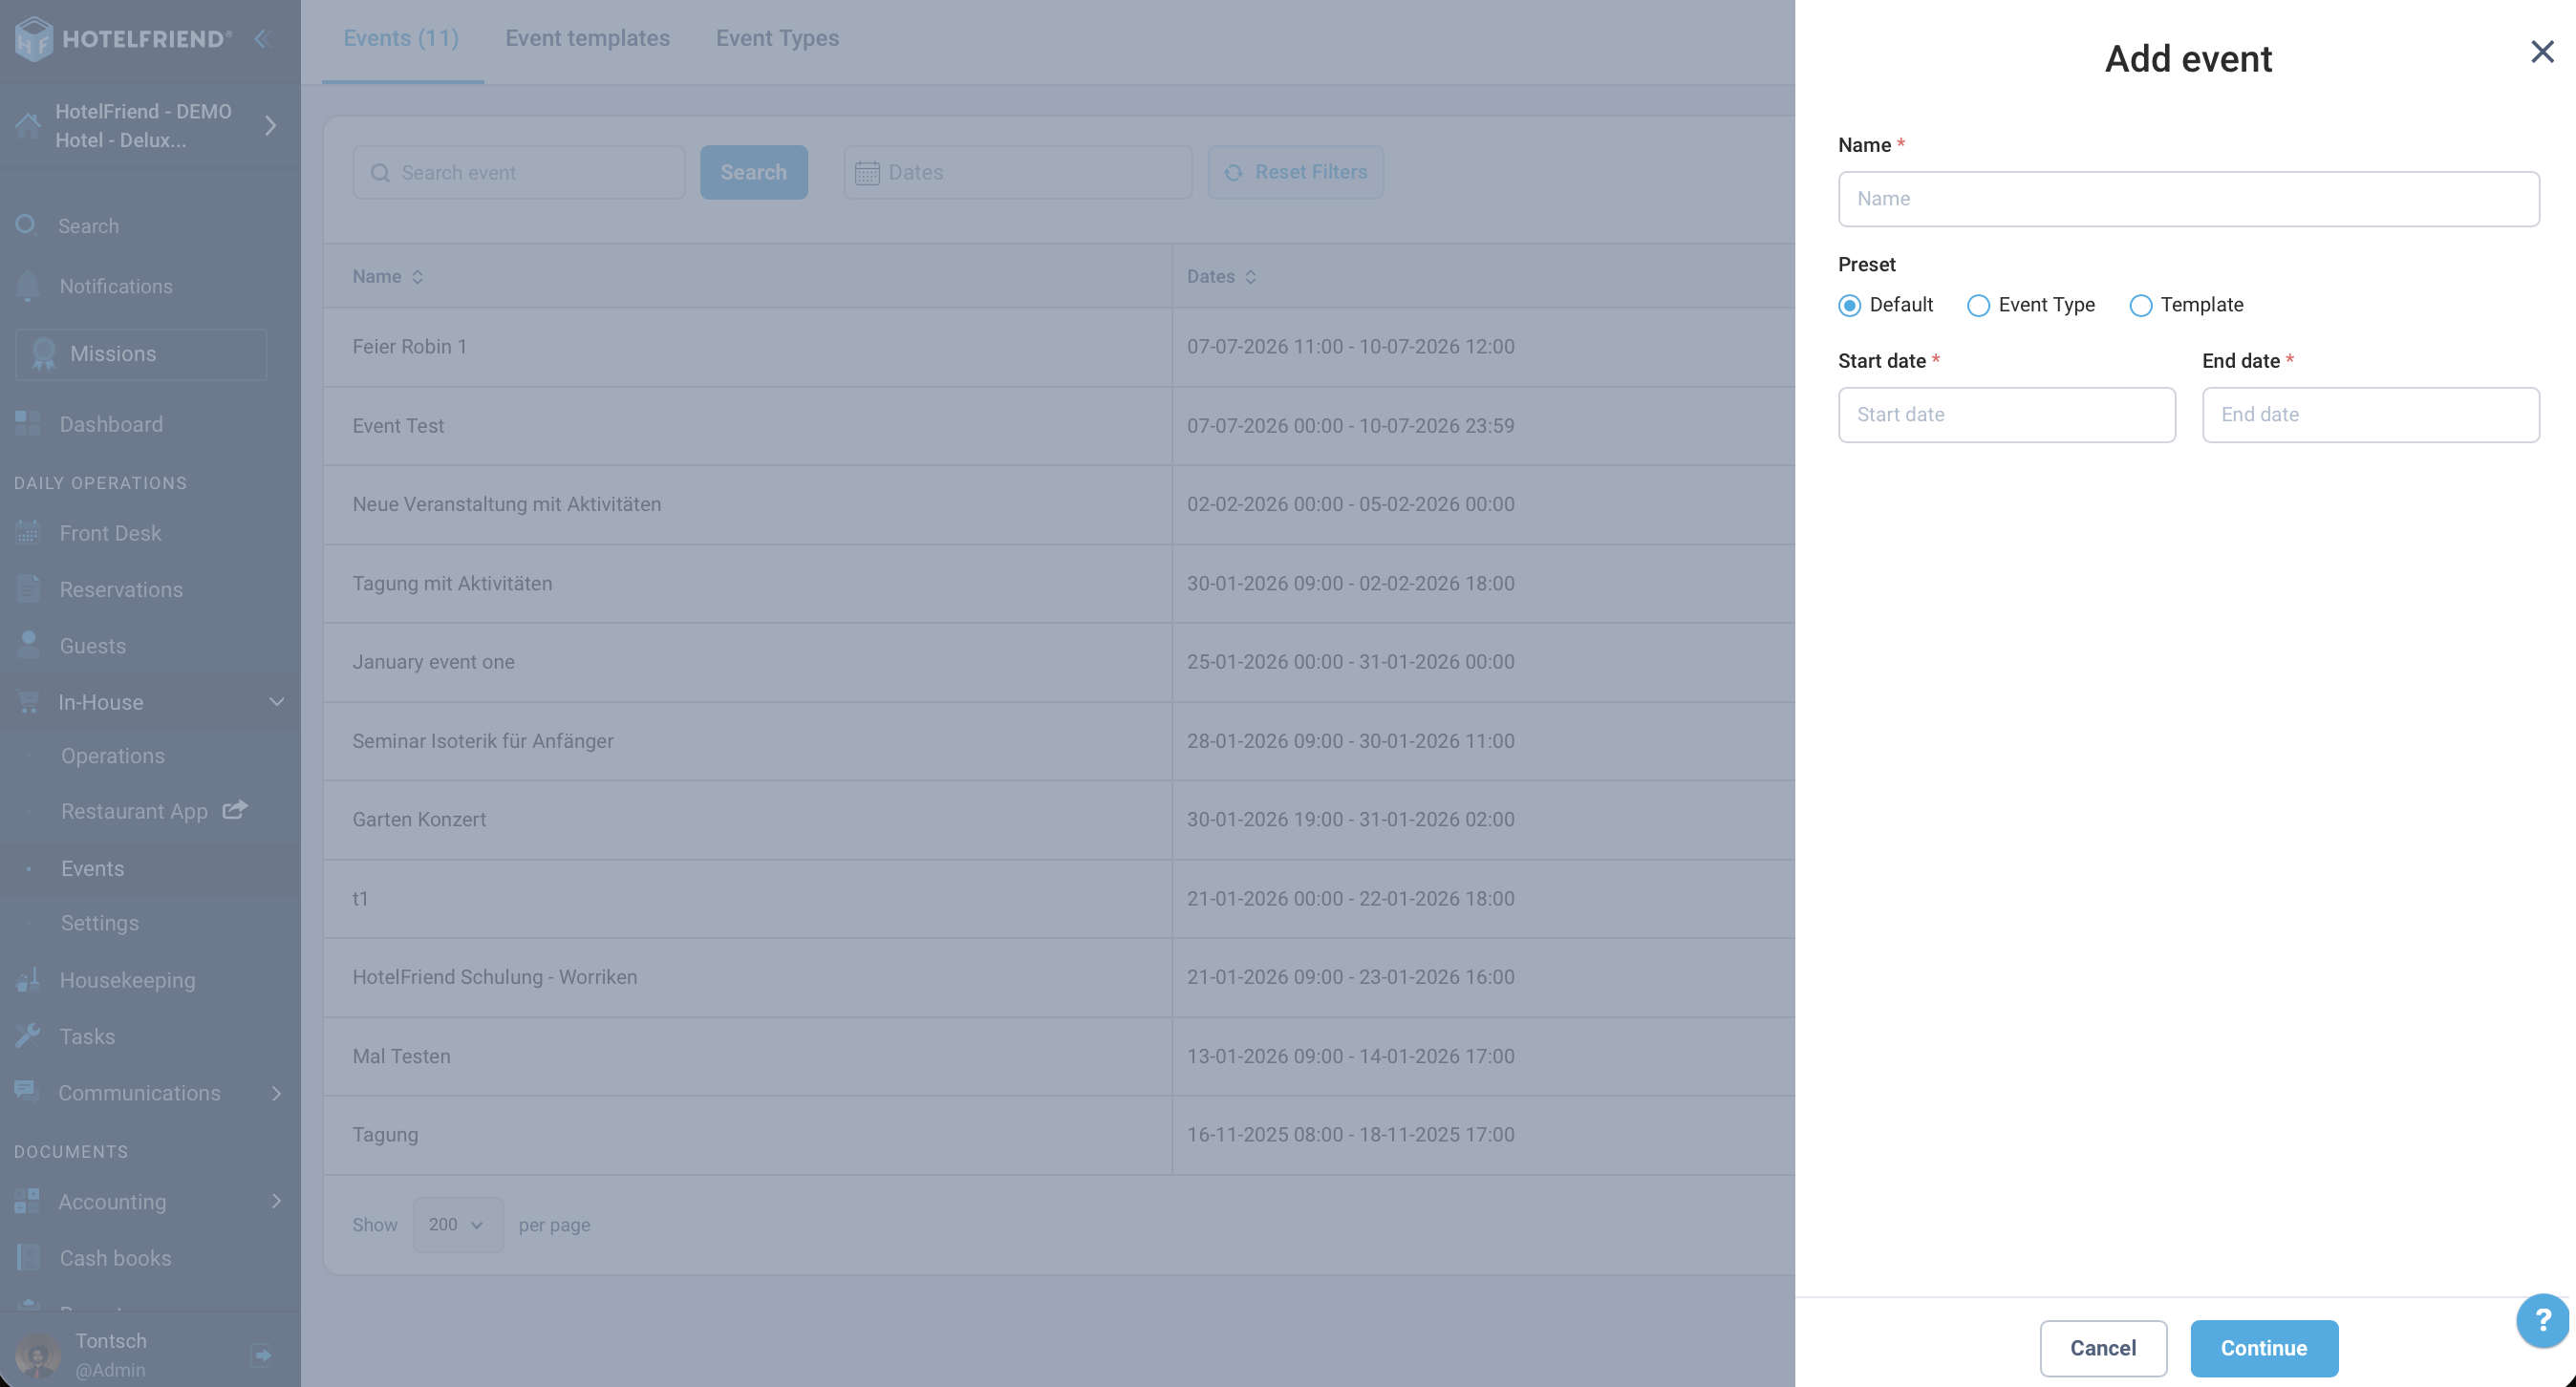
3. Create Event
- Go to In-House → Events → "Create Event".
Step 1 – Basic Info (Modal):
- Select starting point: Event Type (empty schedule) or Template (pre-filled).
- Enter the Event Name.
- Specify Start and End Date + Time and the Location.
- Optional: Enable Preparation Day (the day before the event starts).
- Click "Next".
Step 2 – Detail Page:
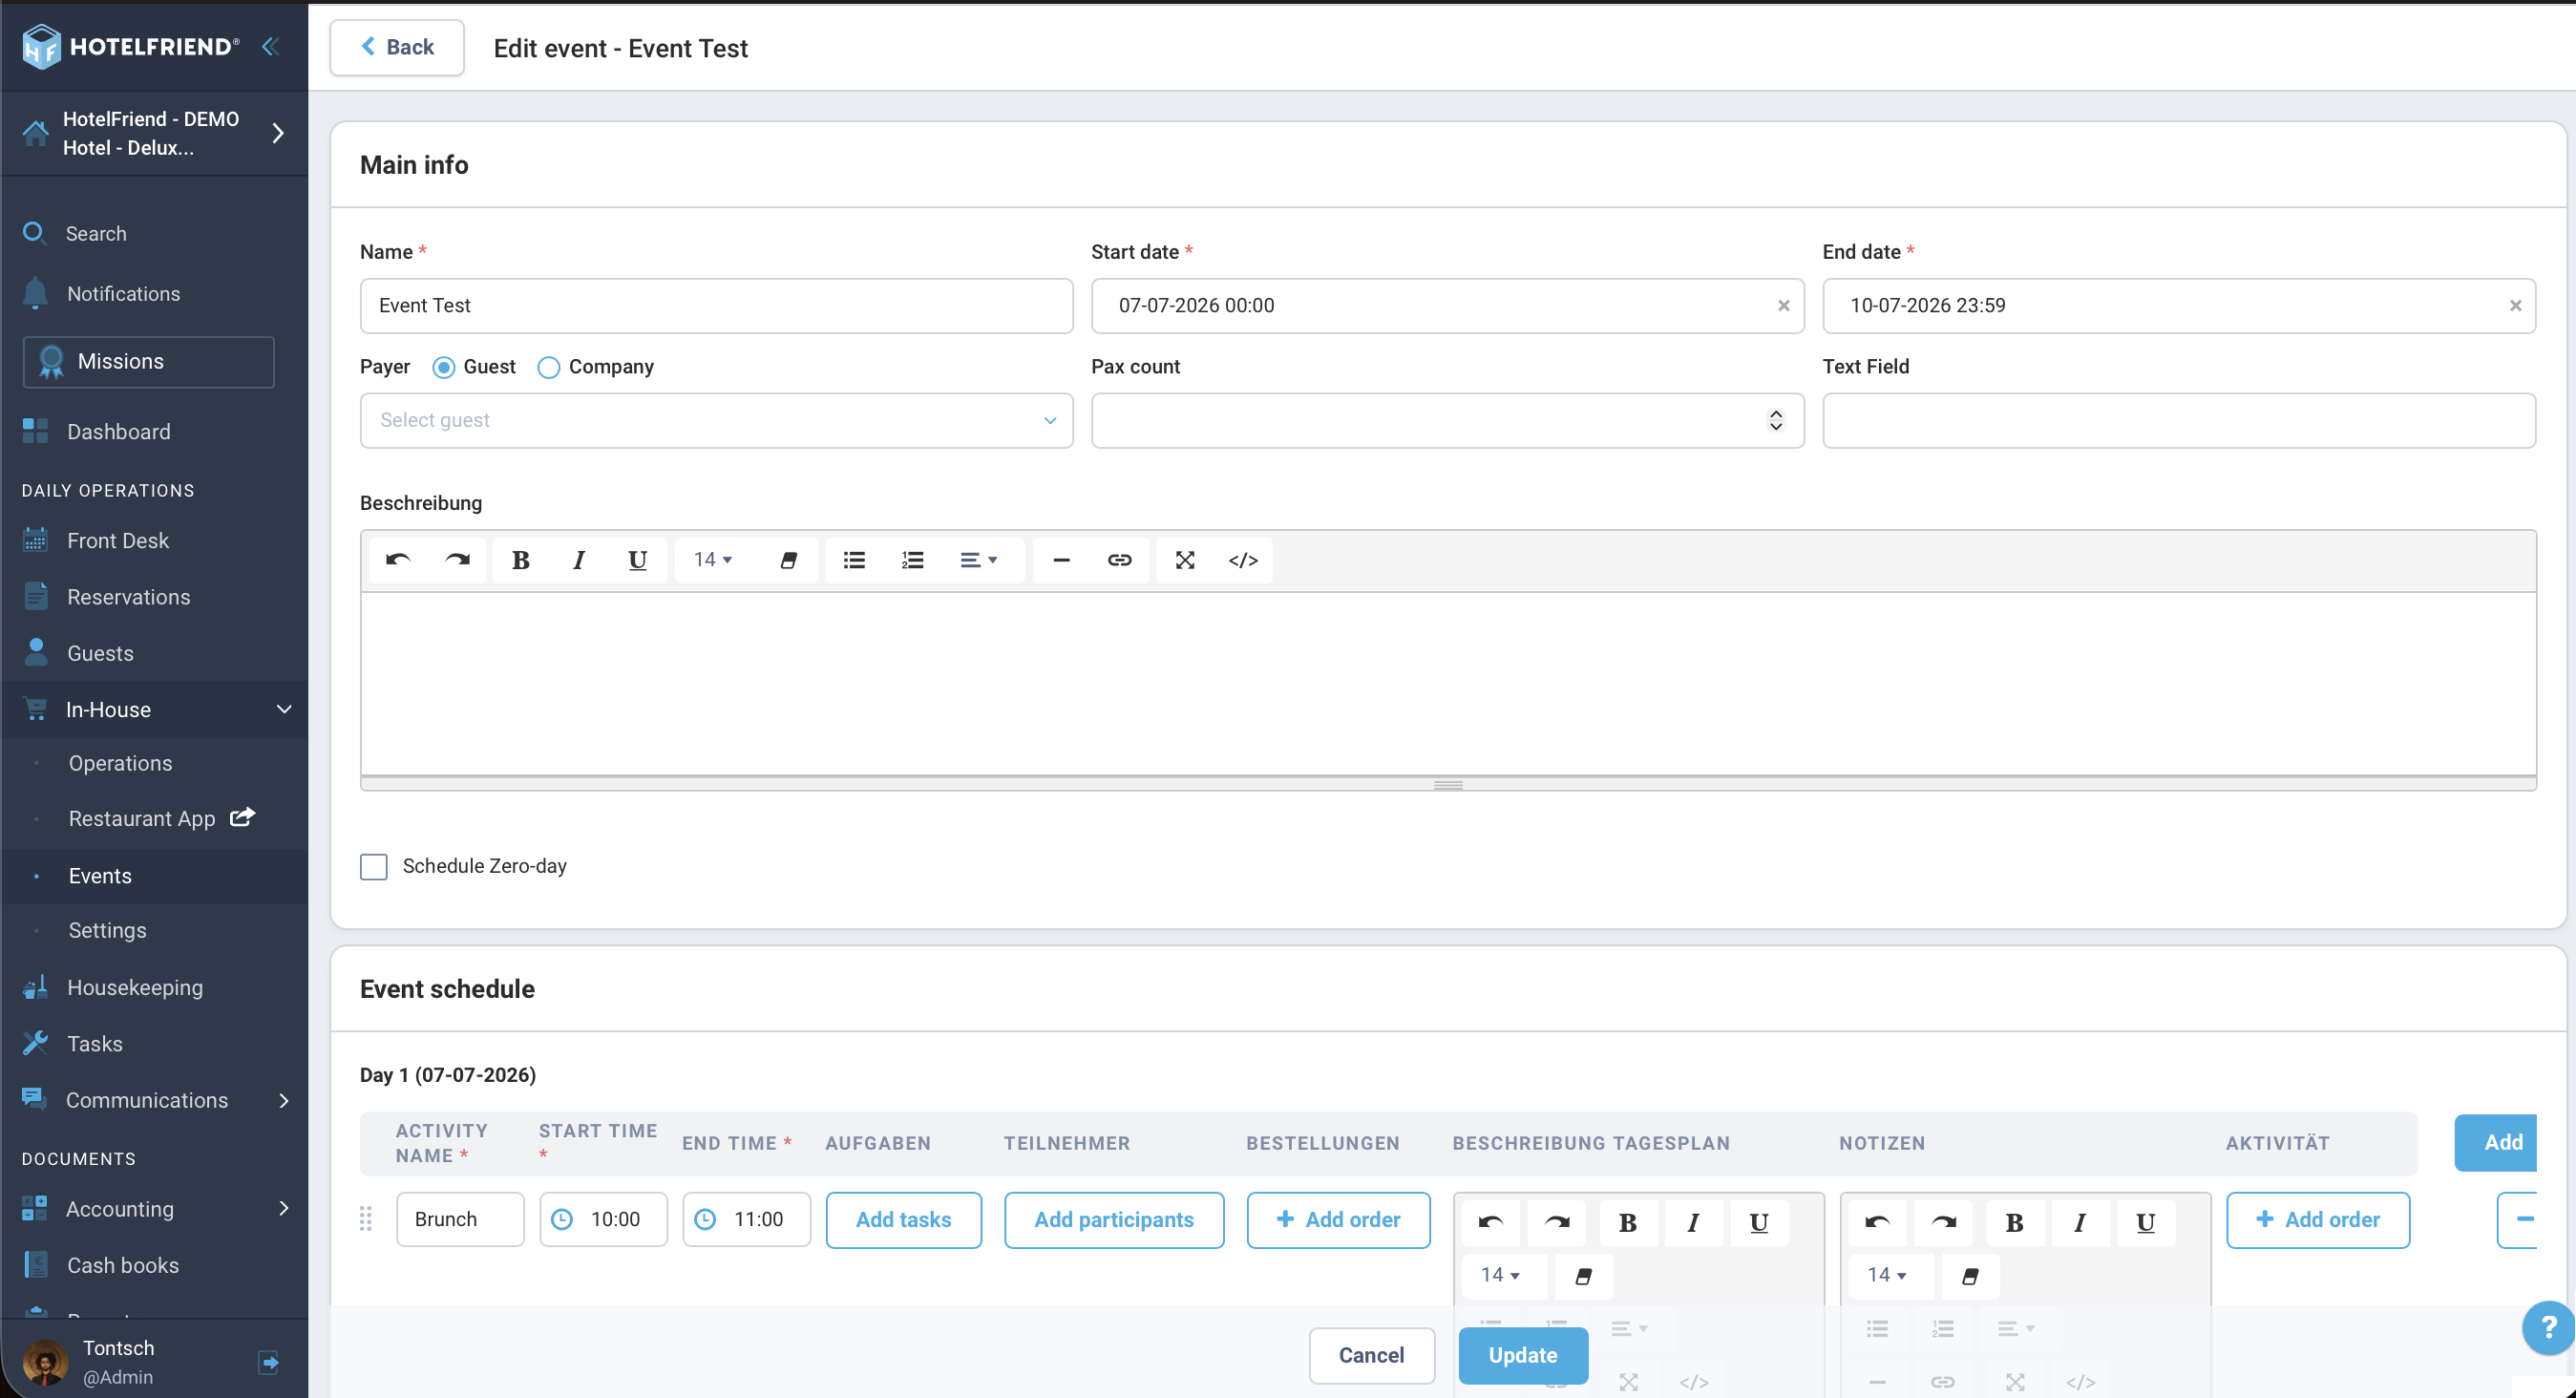
- Fill in all configured fields; the daily schedule will be generated automatically.
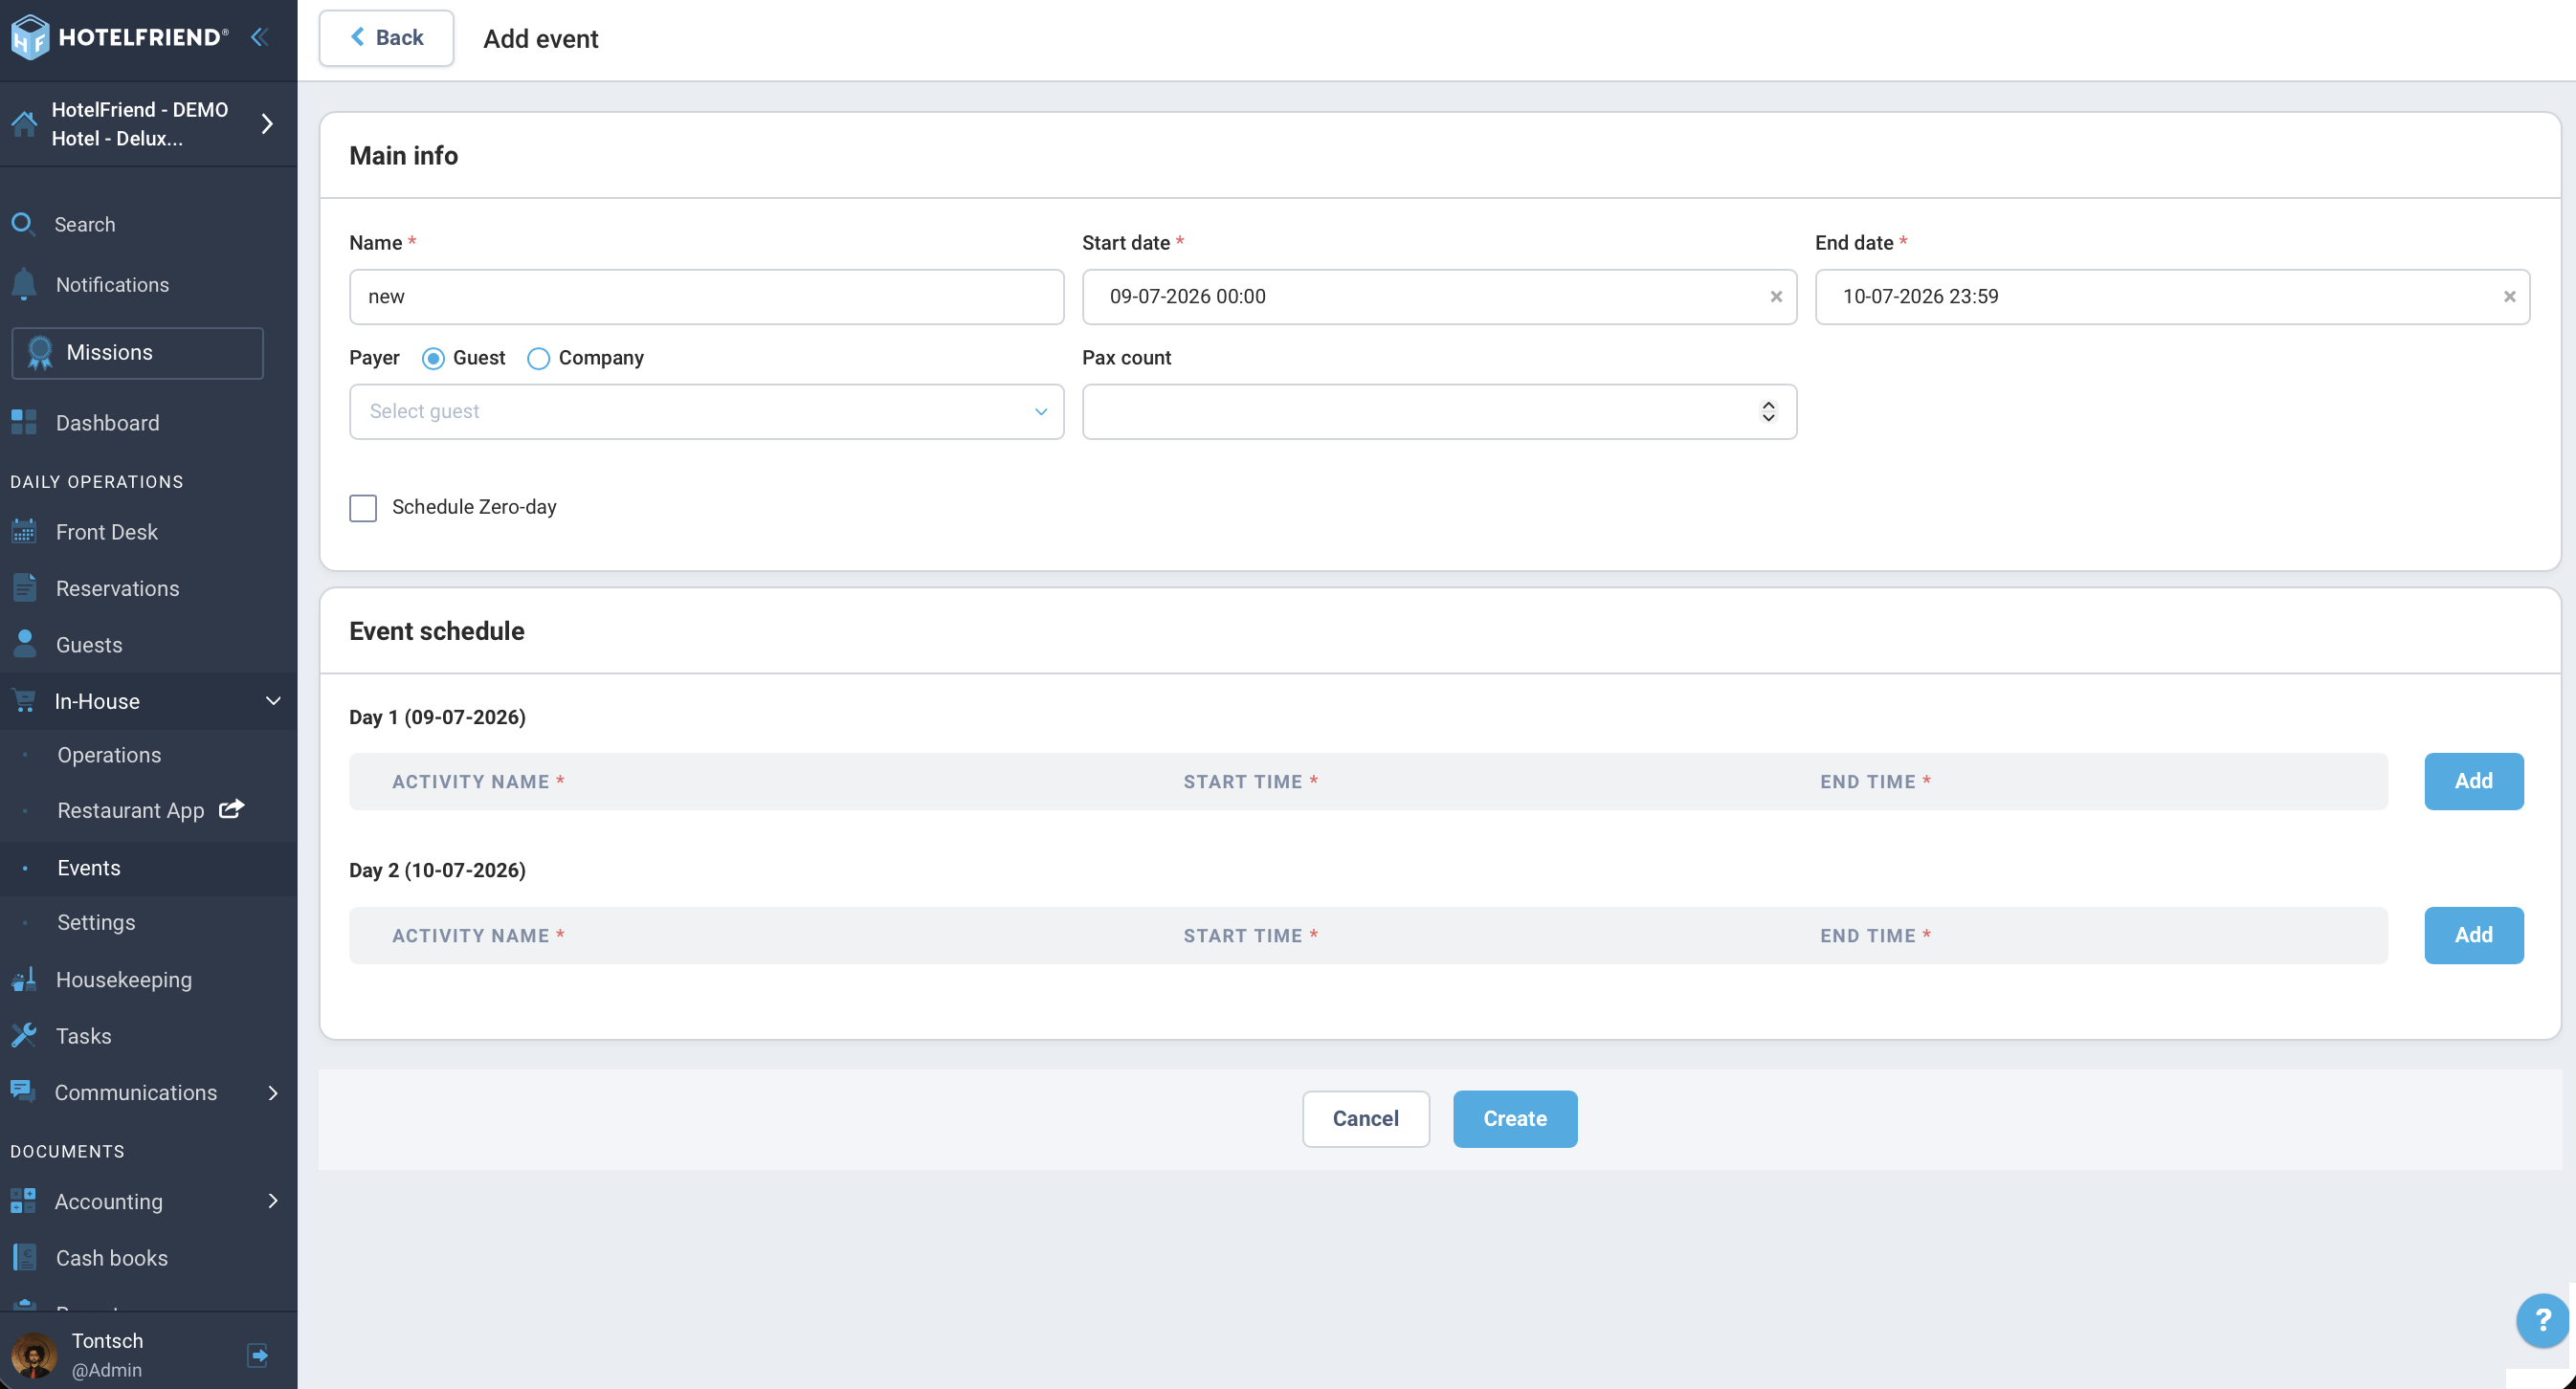
4. Fill Schedule
There is an activity list for each day.
- Click "Add Activity".
- Mandatory fields: Start Time / End Time, Activity Name.
- Optional additions:
- Resources/Location: Assign room or equipment.
- Department & Staff: who is responsible
- Link Order: Attach a service directly to the activity.
- Add Task: Title, Description, Department, Deadline.
- Comment
- Repeat for all activities and days.
5. Link Bookings (Optional)
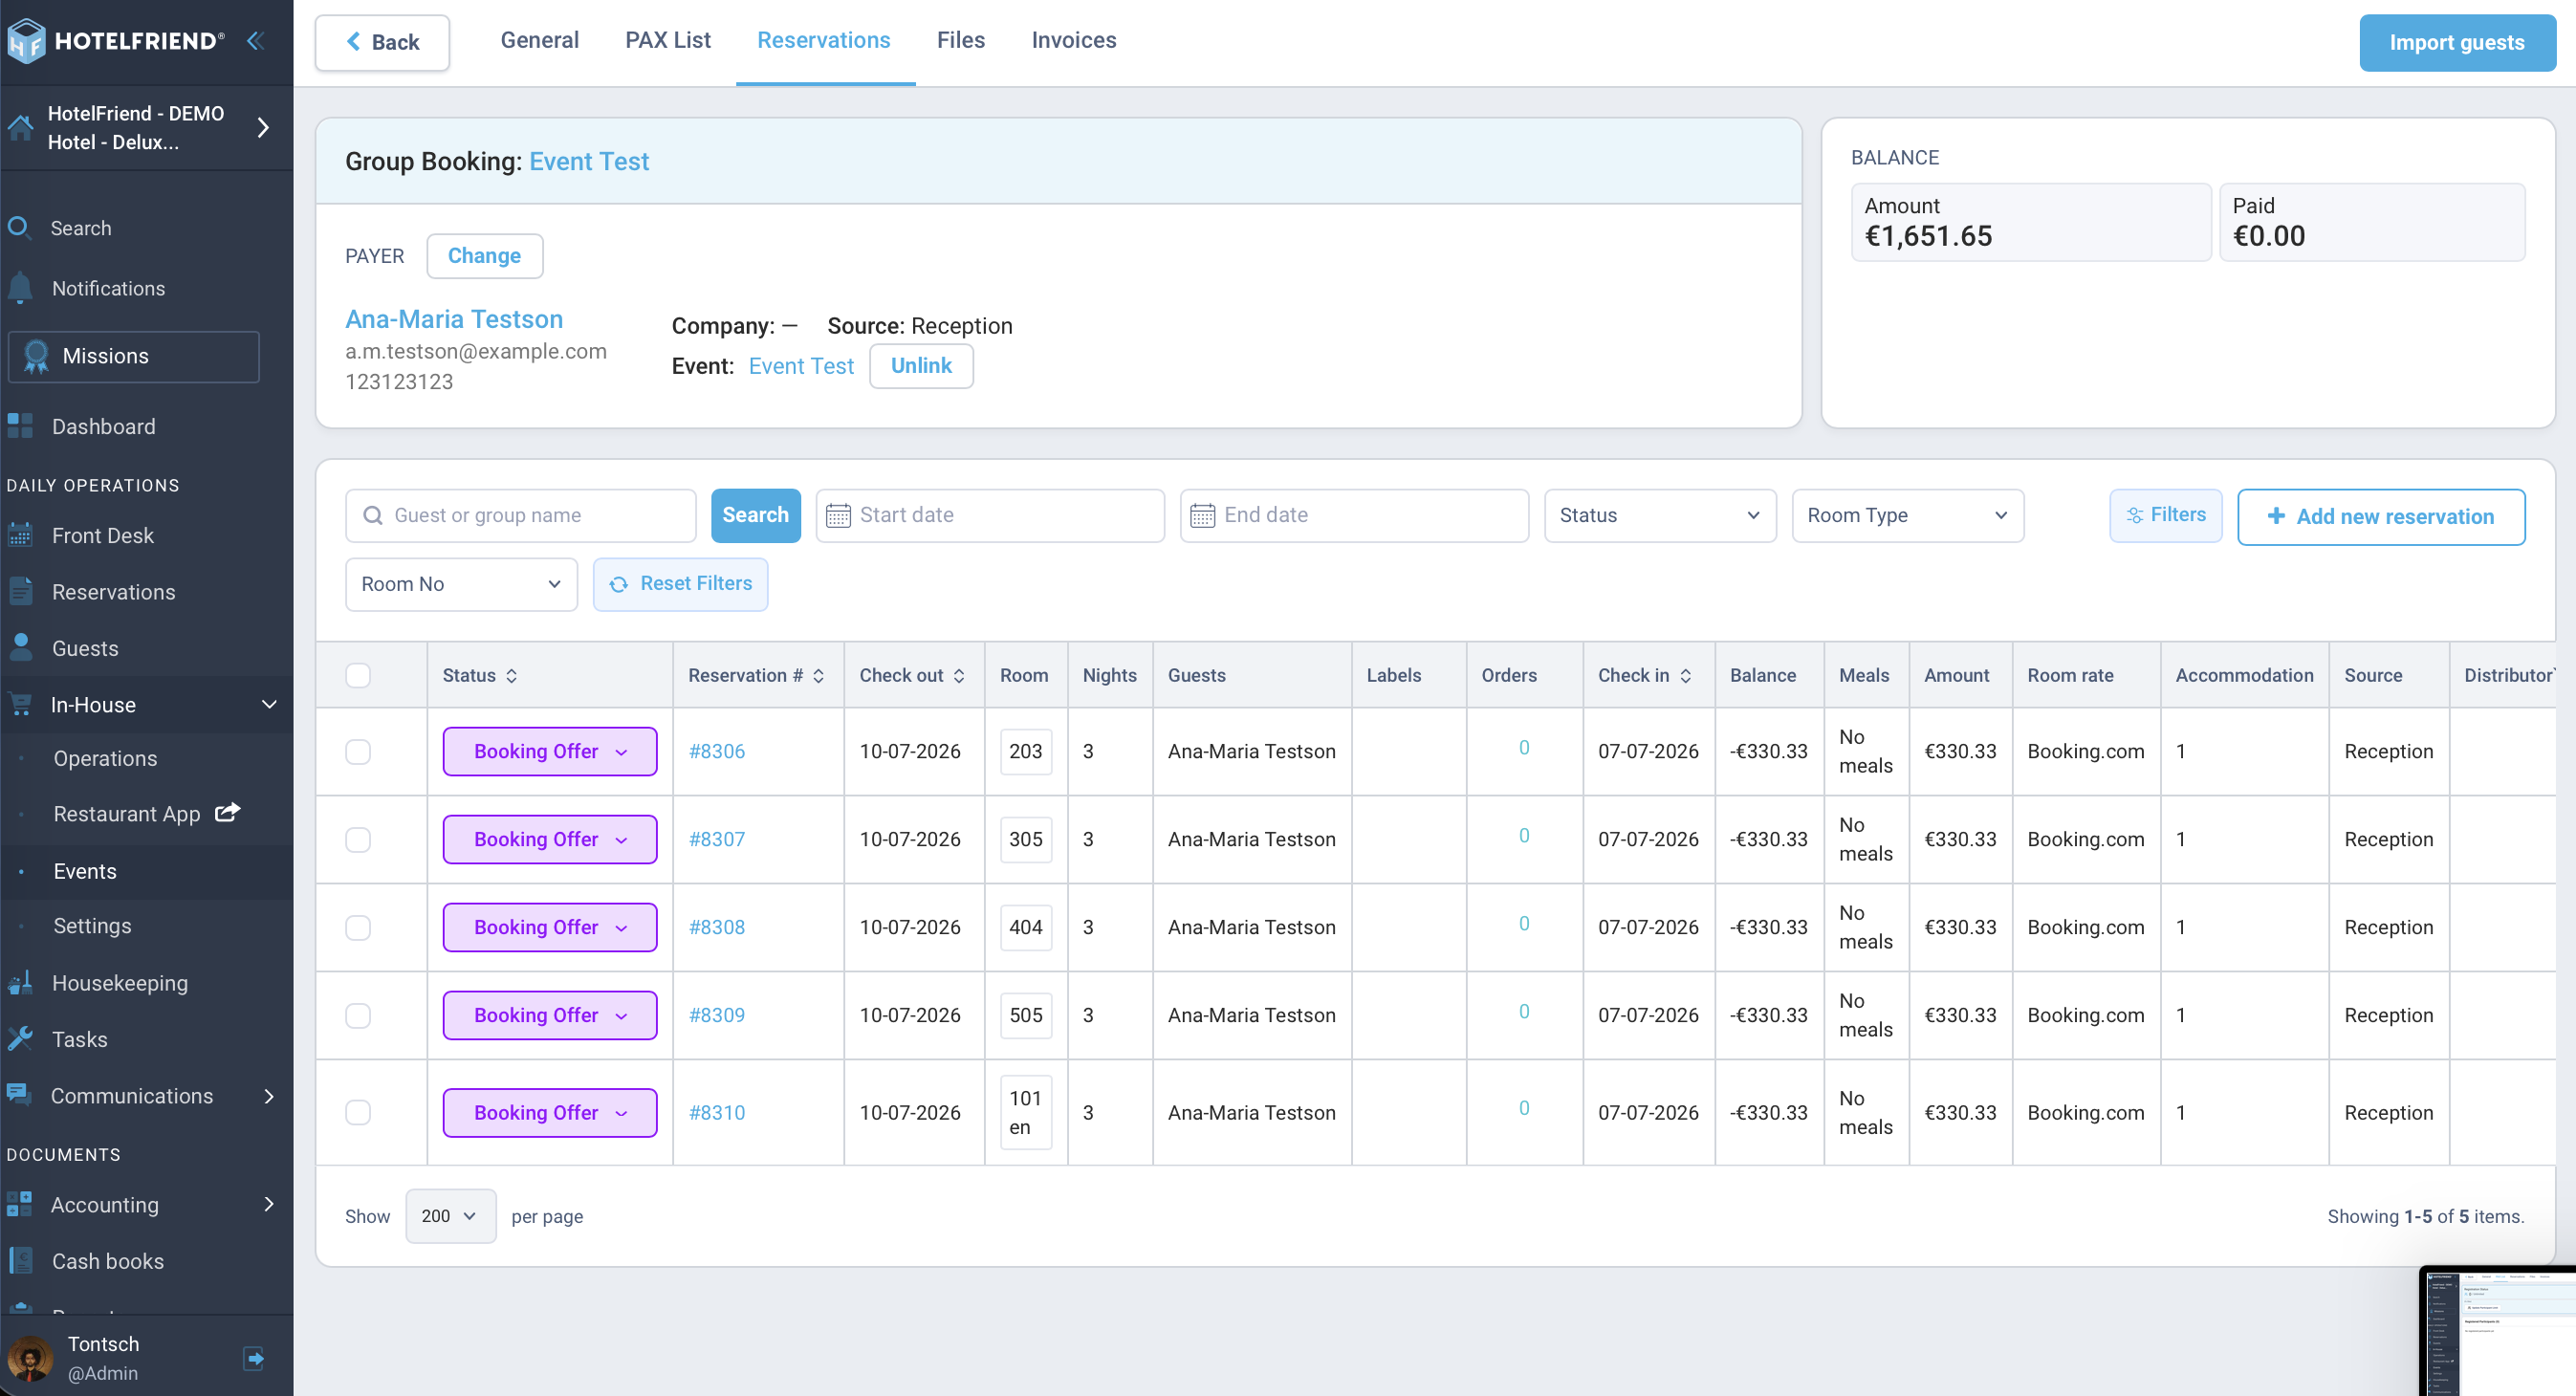
- Inside the Event, open the Reservations tab.
- "Add Booking" → the normal booking wizard opens.
- The booking is automatically linked to the event.
- A note about the linked event appears in the booking details.
Note: A booking can only be linked to one event at a time.
6. Manage Participants (PAX List)
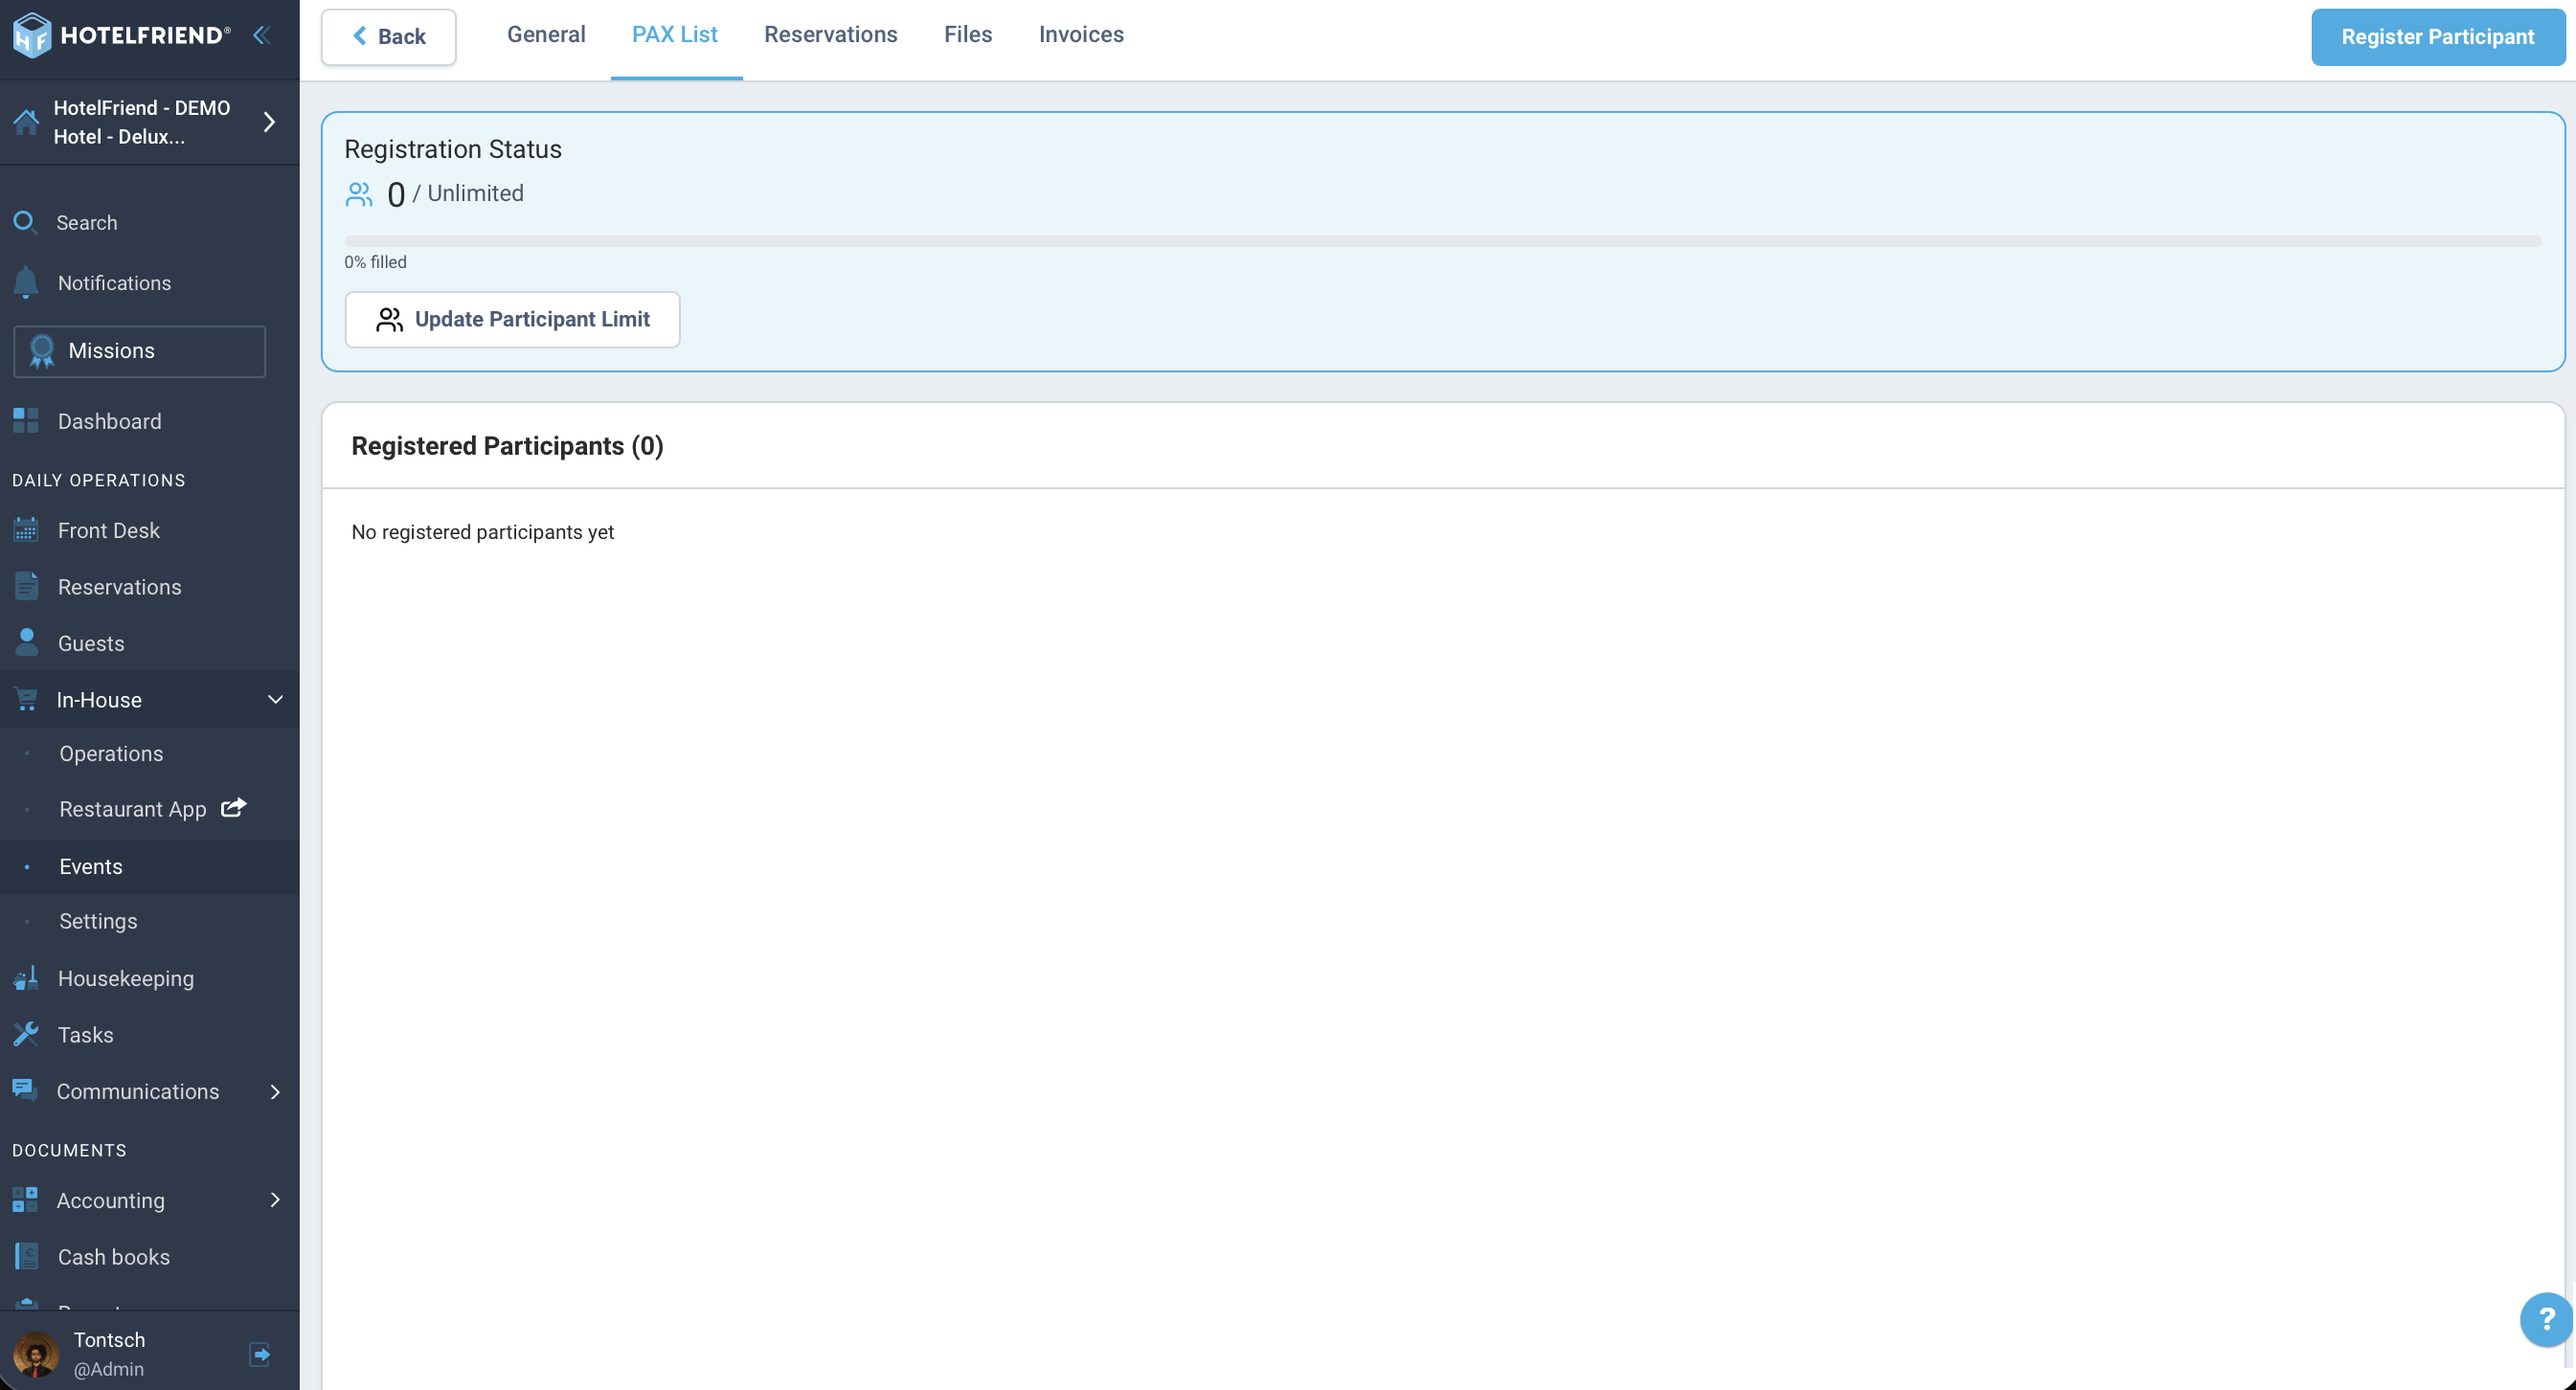
- Inside the Event, open the PAX List tab.
- Set the Maximum number of participants.
- Add participants:
- Manual: "Add Guest" → Name, E-Mail (Mandatory).
- Import: from a linked group booking.
- Assign guests to individual activities: Activity → "Add Guests" → select from PAX List.
- The number appears in the schedule; a click shows the names.
7. Exporting
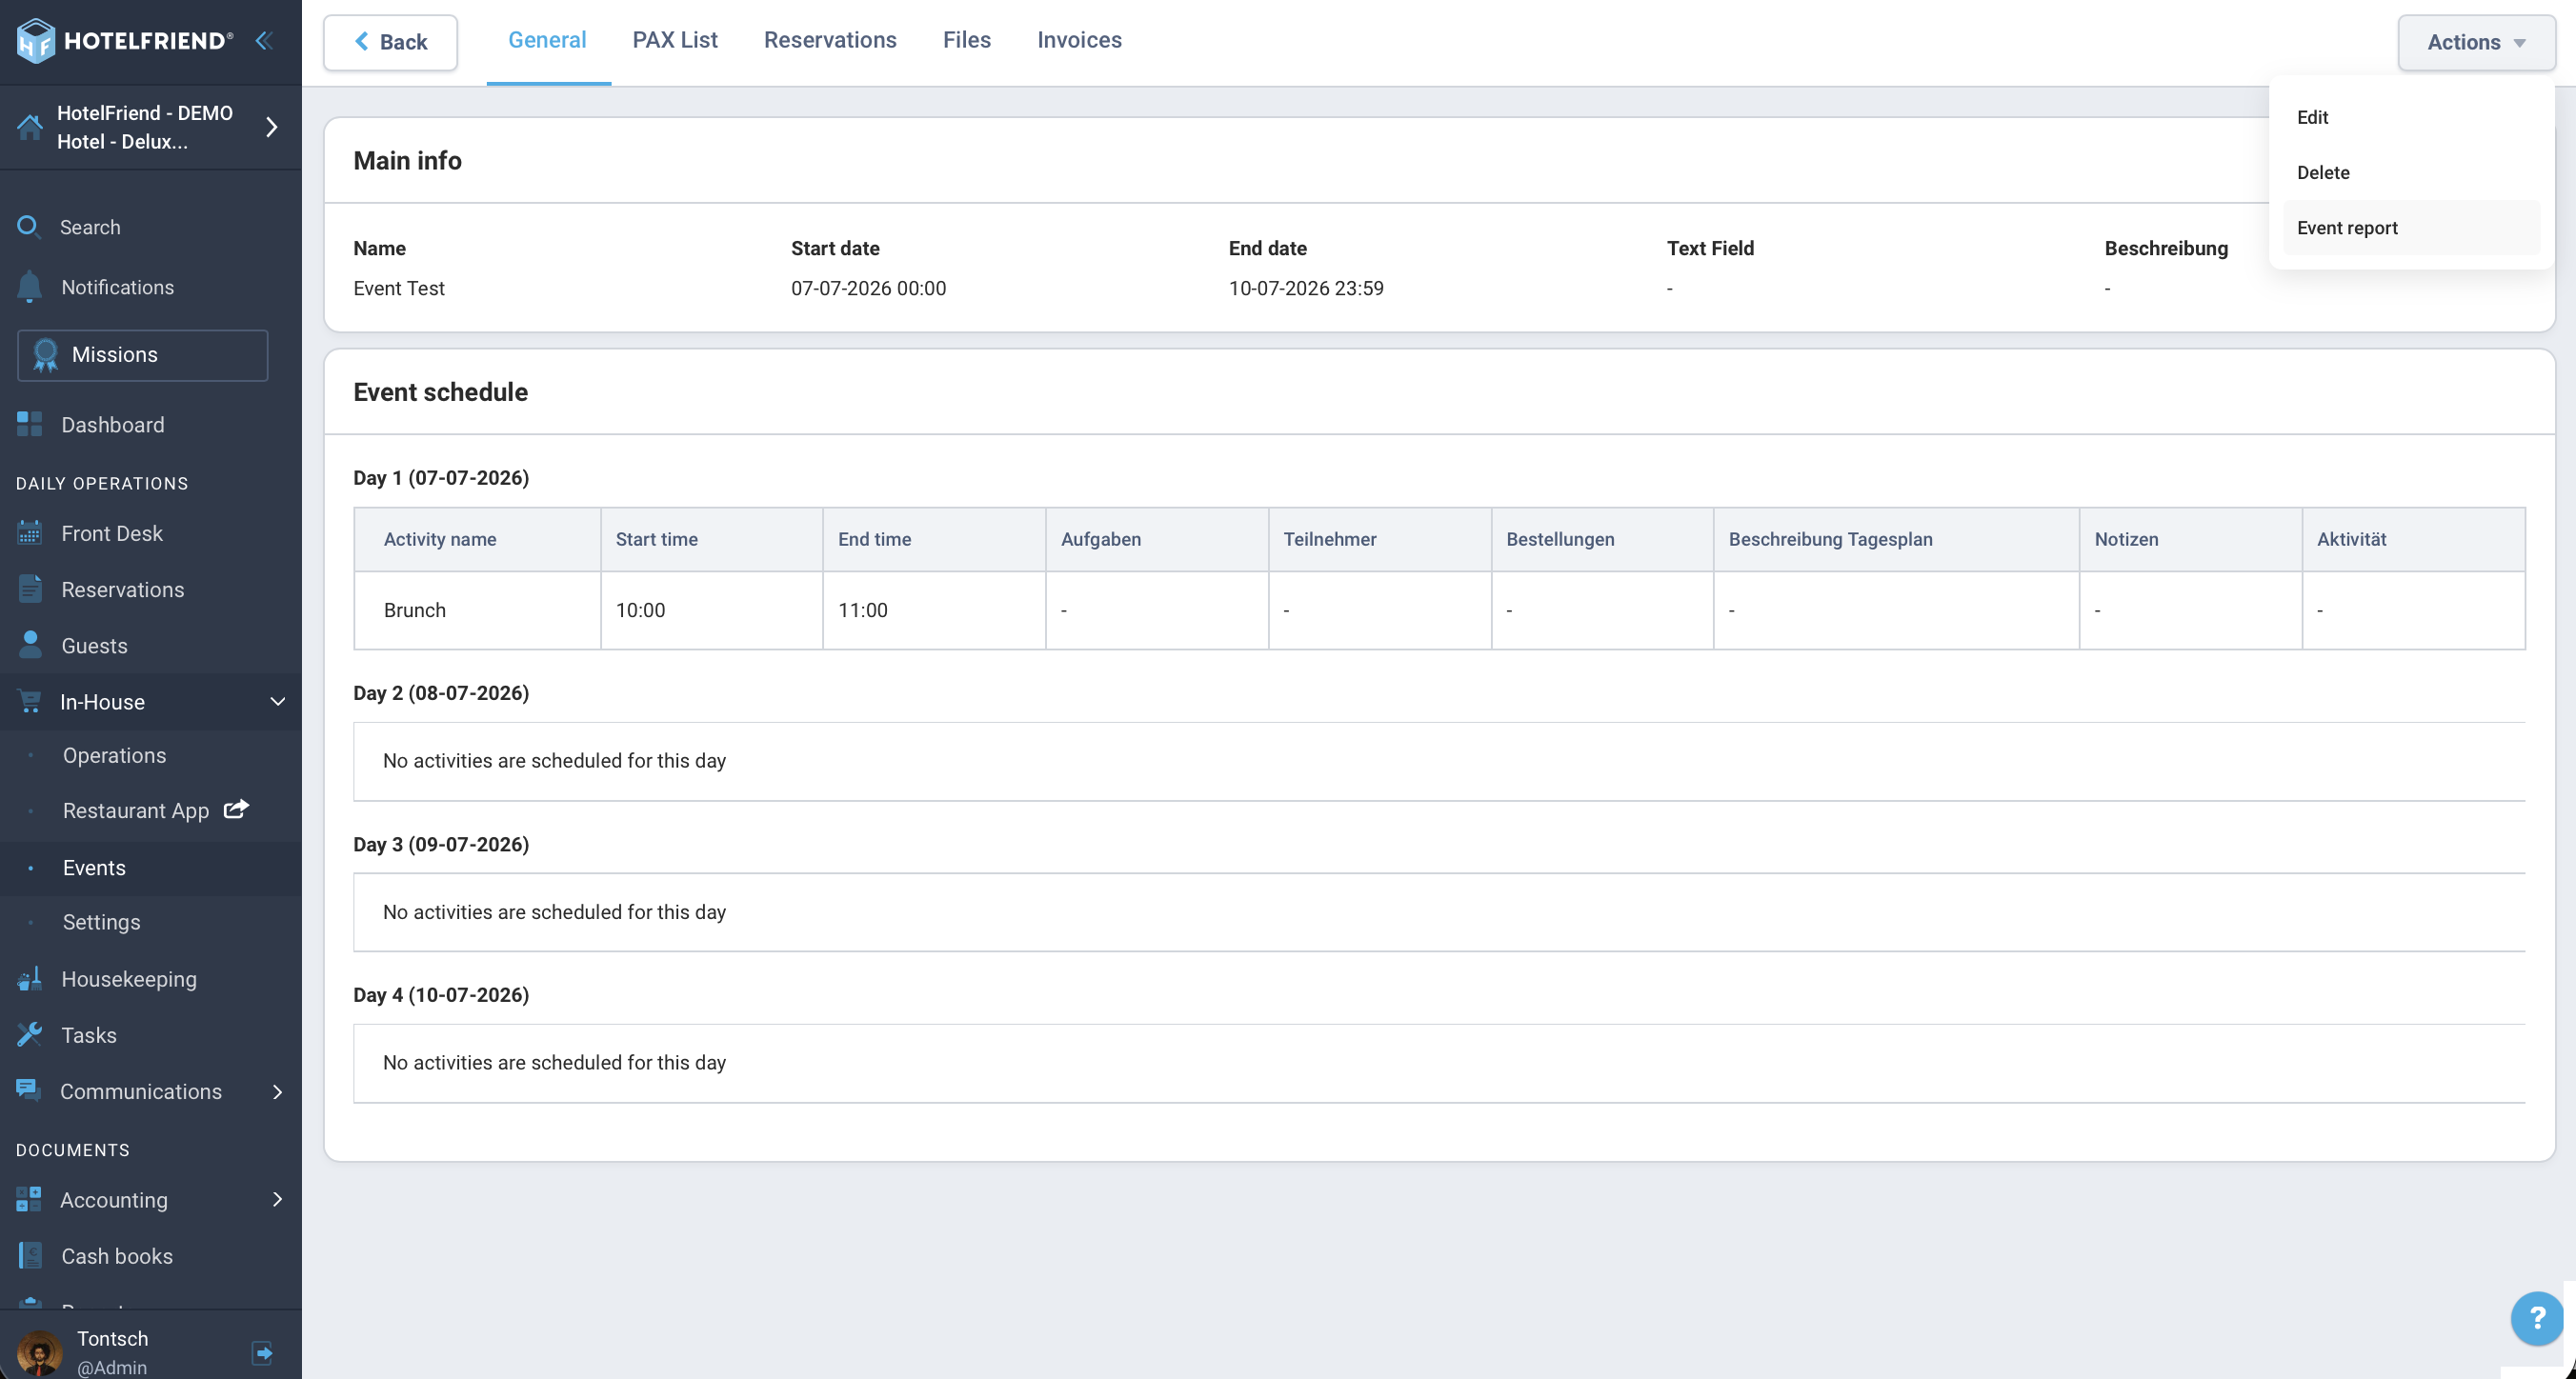
- Event Report (PDF) – complete event overview:
Event → Export → "Event Report" - Function Sheet (PDF) – operational departmental plan:
Module "Events" → Export Menu → "Function Sheet"- Filter: Date/Period + Department (all or specific).
- Content: Activities grouped by department, staff, tasks, participants.
8. Event Lifecycle and Statuses
Every event goes through a binding lifecycle that determines which resources are blocked and which data can be edited.
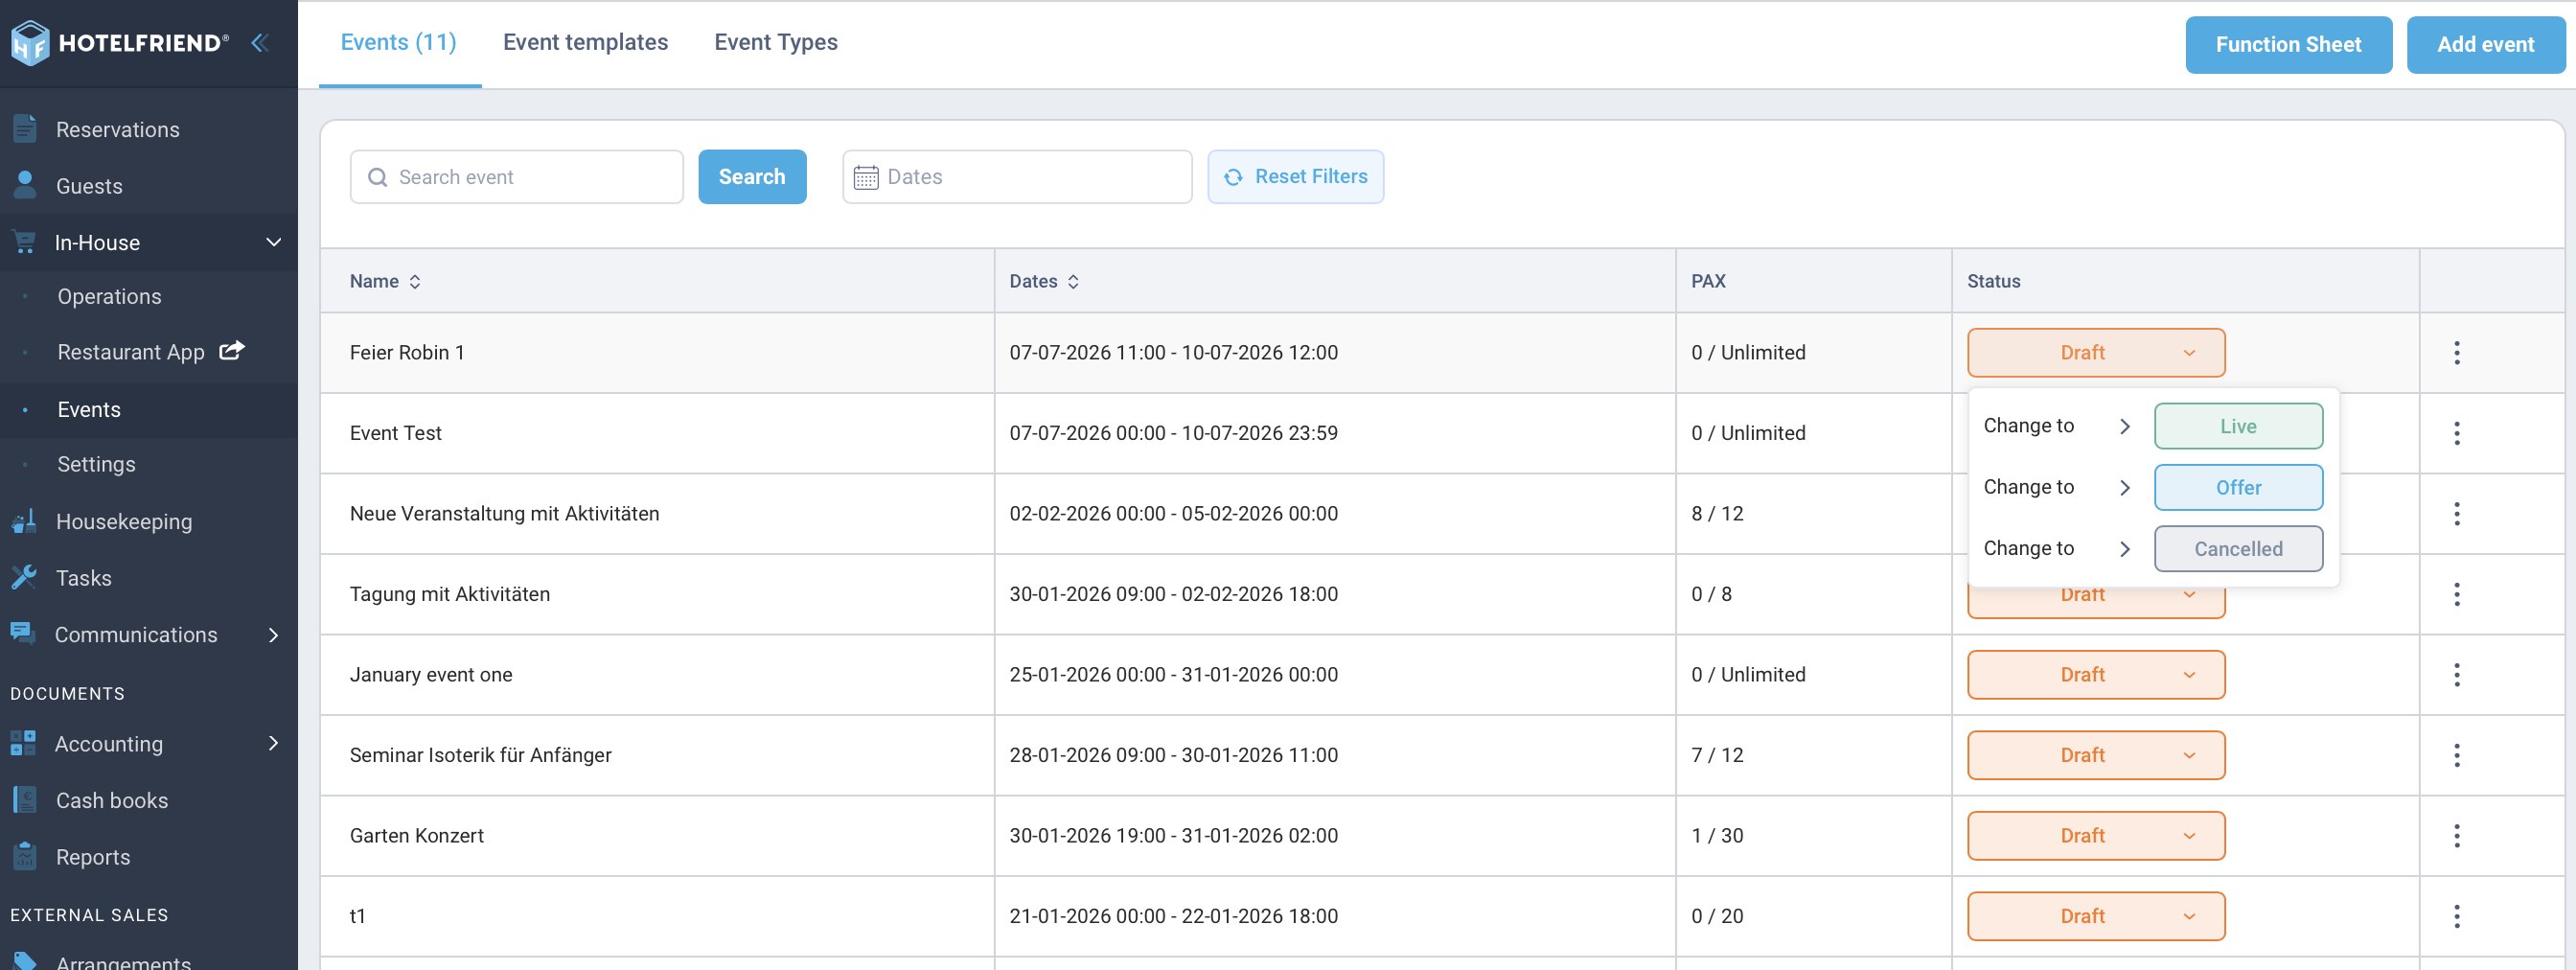
- Status: Draft: This is the default status upon creation. All parameters (times, rooms, prices) are fully editable. No final system resources are blocked.
- Status: Offer: The offer has been sent to the customer. Basic parameters remain editable, but changes to prices or capacities procedurally require the generation of a new offer.
- Status: Live (Confirmed/Active): The event is finalized and bindingly blocks room capacities. Editability is strictly limited to prevent accidental conflicts with existing resources.
- Status: Cancelled: The event is permanently cancelled. The record is archived as read-only. Previously blocked resources are automatically released back into the system.
Required permissions: Status changes, especially escalation to "Live" or cancellation via "Cancel", are tied to specific user roles. Standard users without the corresponding event management rights cannot execute these critical transitions.
Important Notes
- Order: Create Event Type (and optional Template) before the first Event.
- Default Event Type exists automatically – can be used for simple events without custom setup.
- Linking: A booking can only be linked to one event at a time.
- Avoid double bookings: Limit resources via services/limits and clearly assign tasks by department.
Do you have any further questions? Contact us at support@hotelfriend.com or use the live chat.

