

How to mark Resources as “Out of Service"
This article explains how to mark Resources in the system as "Out of Service" for specific time periods. This feature helps you manage item availability and ensures that any inventory bookings during these times are accurately reflected.
Below, you will find step-by-step instructions to configure these settings and create multiple "Out of Service" periods.
Here is how to mark your resources as "Out of Service":
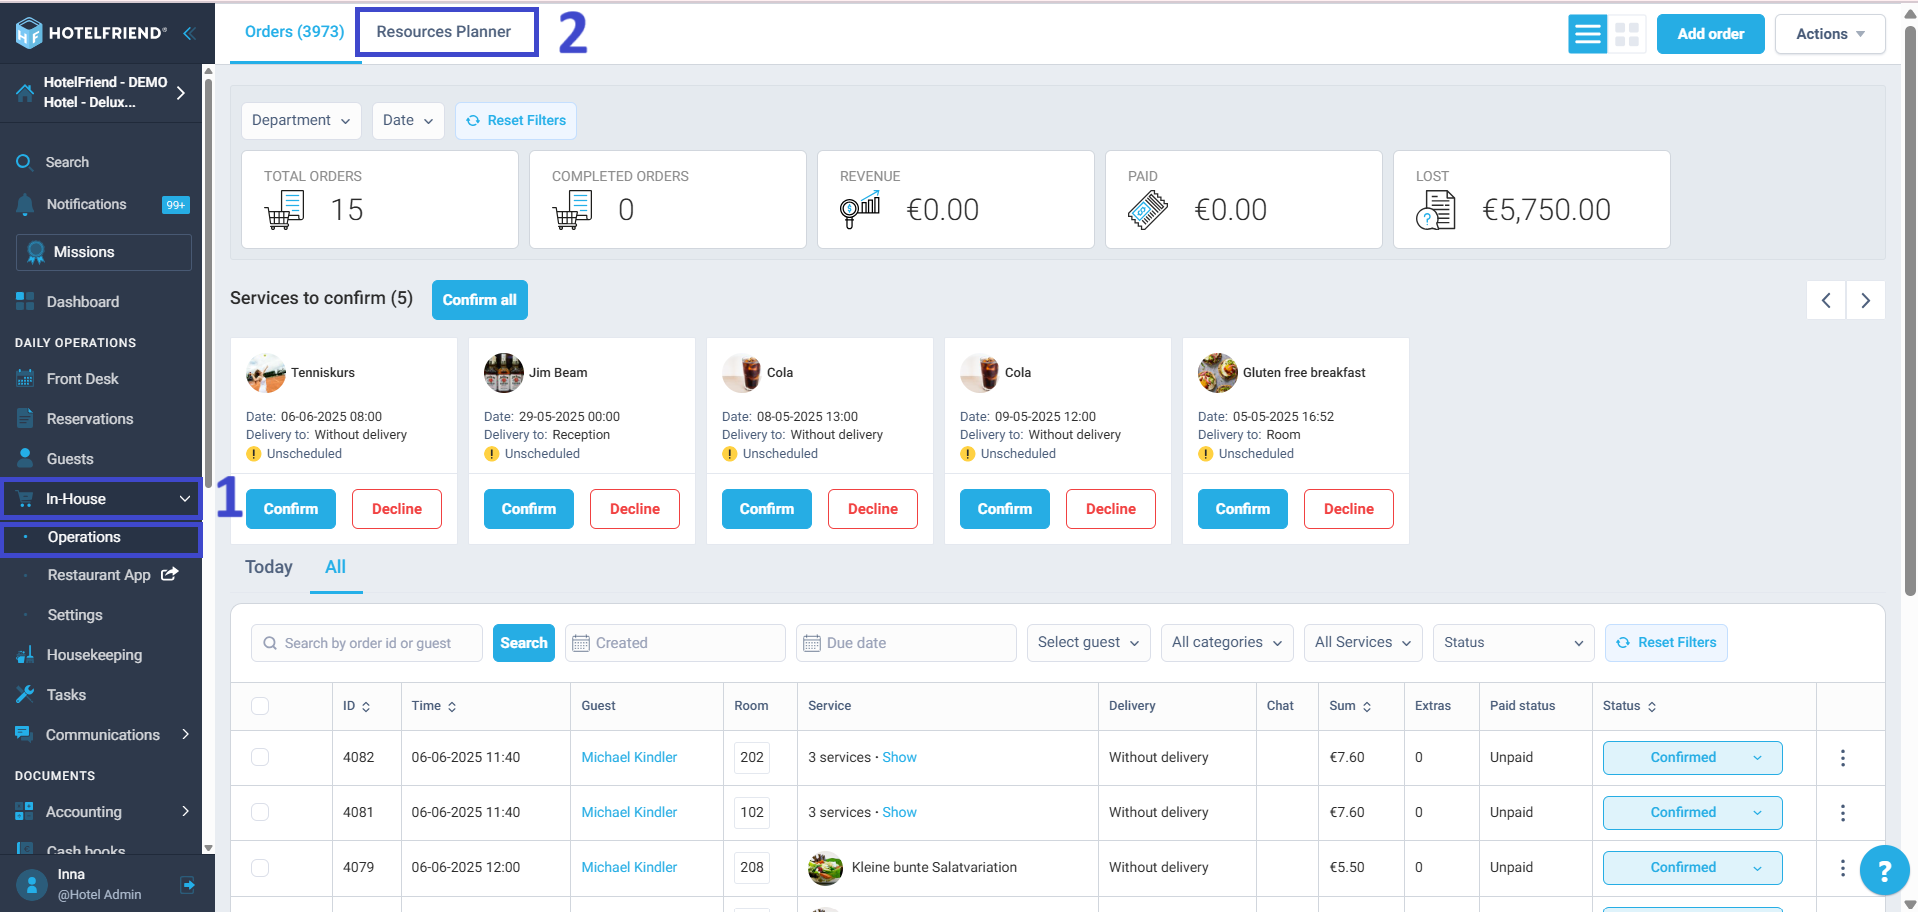
- On the left-side menu, navigate to the In-House module.
- In the Operations sub-menu, go to the Resources Planner tab.
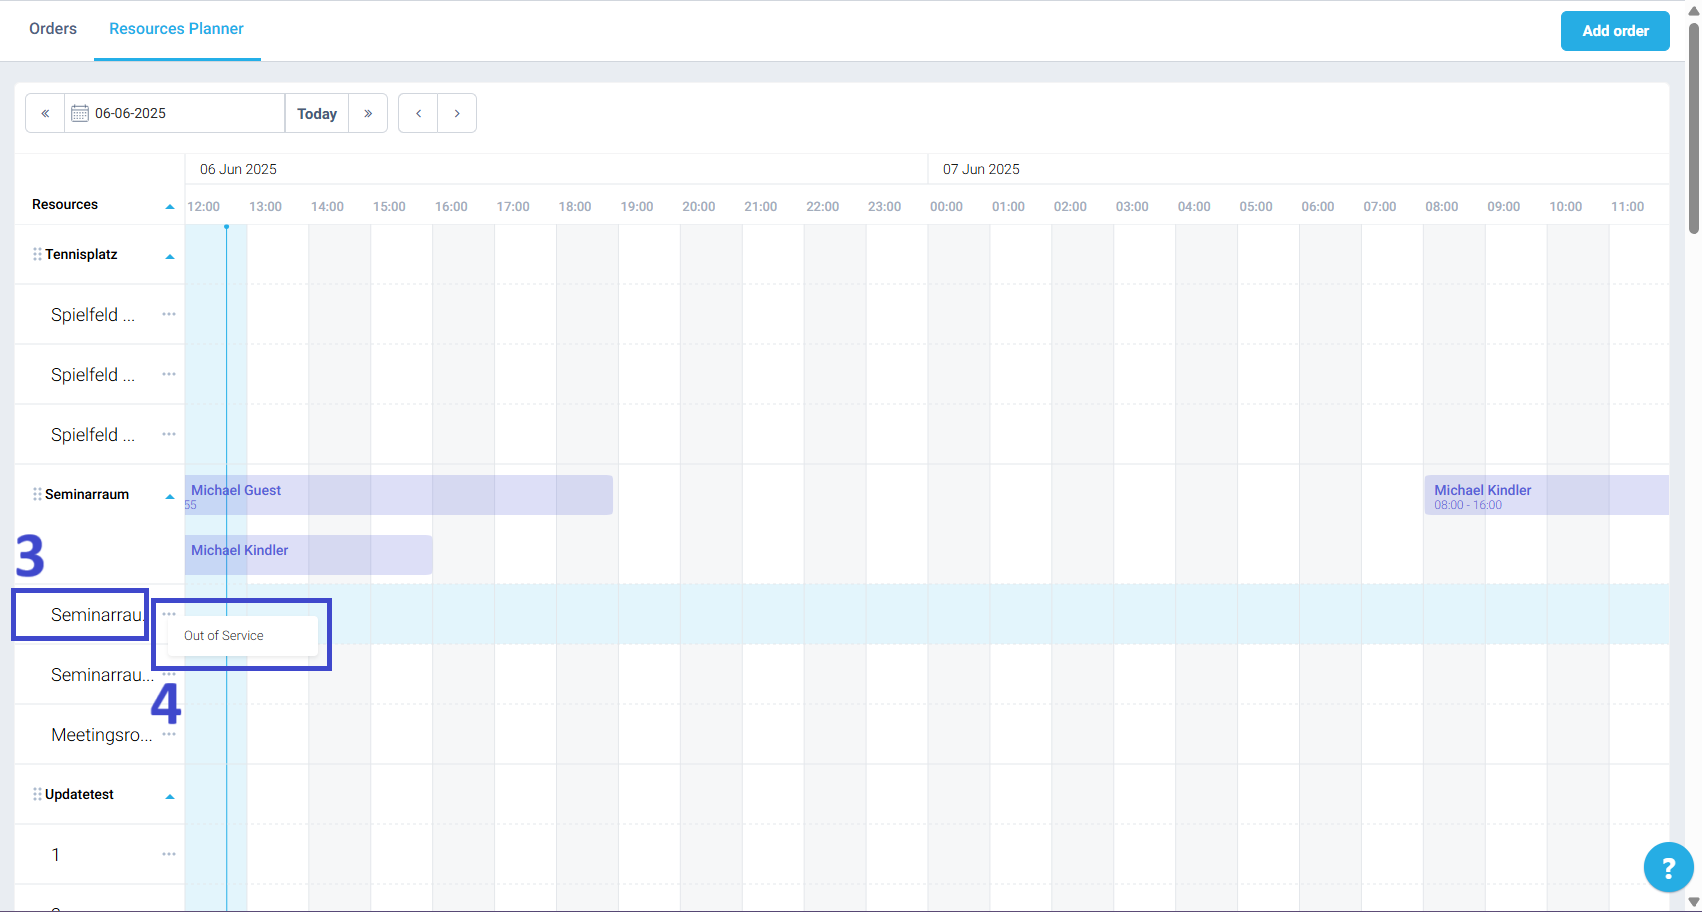
- Locate the Resource that you want to set as Out of Service.
- Click on the three dots next to the resource and select the Out of Service option.
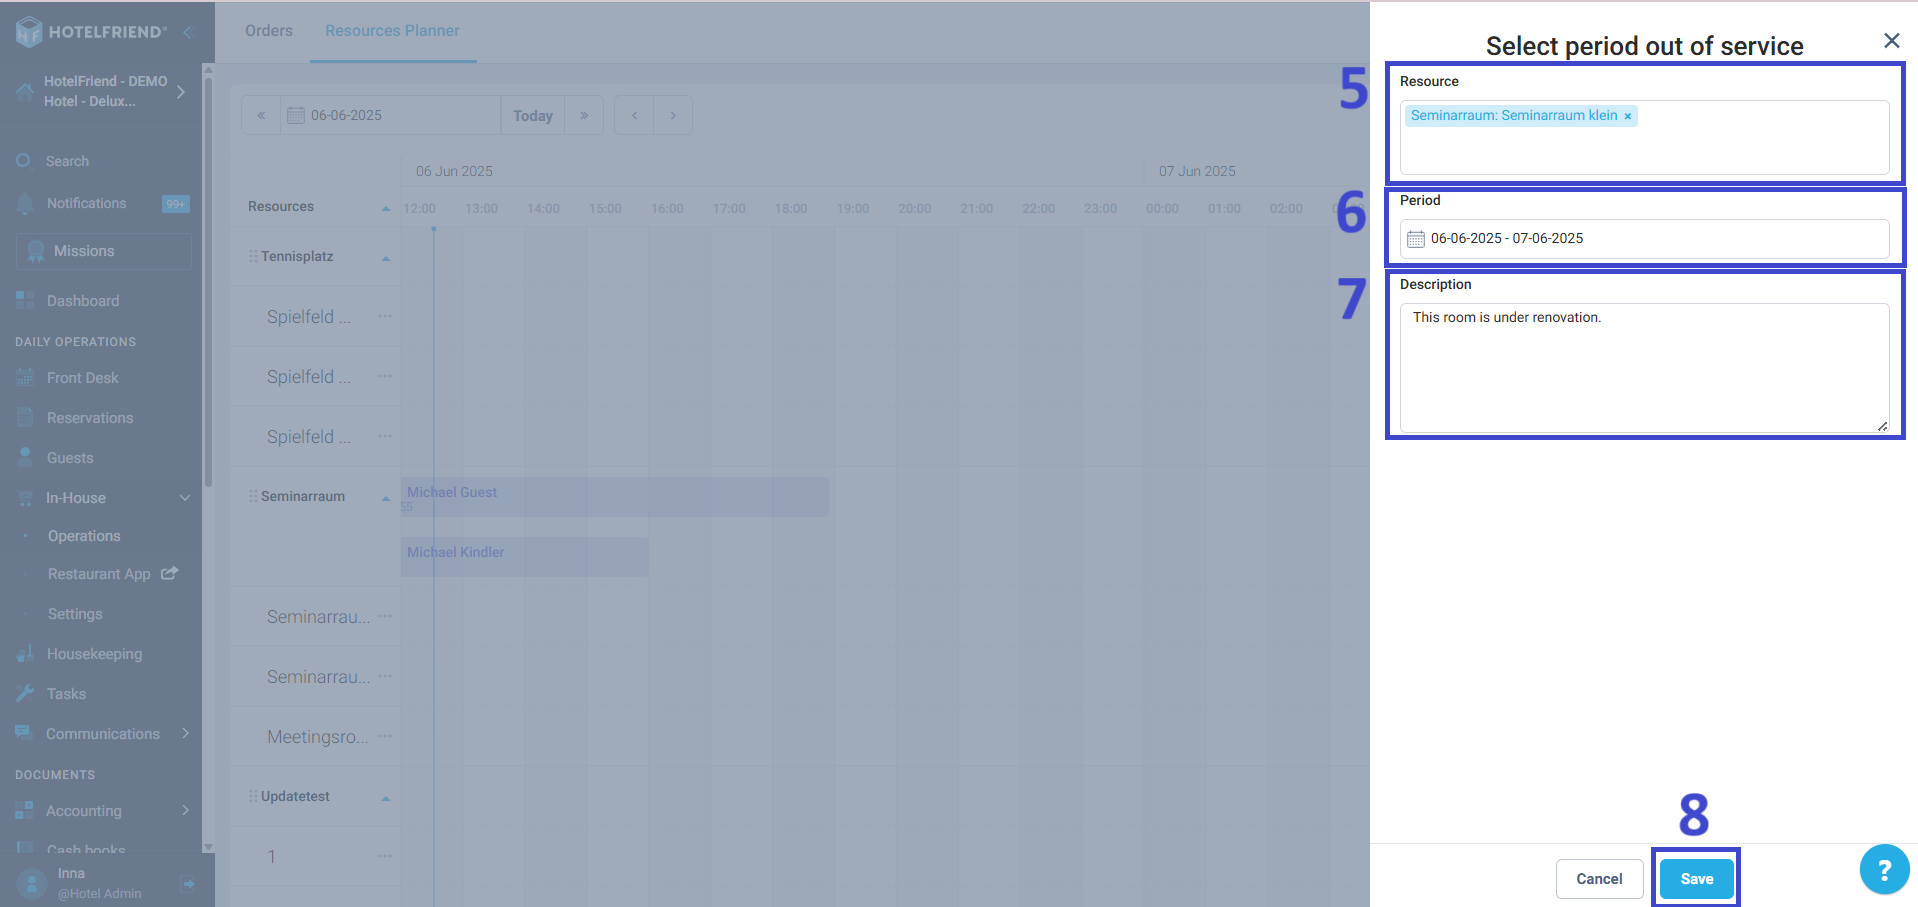
- Select one or more items.
- Set the duration for when the Resource will be Out of Service.
- Include a description to explain the reason for marking it Out of Service.
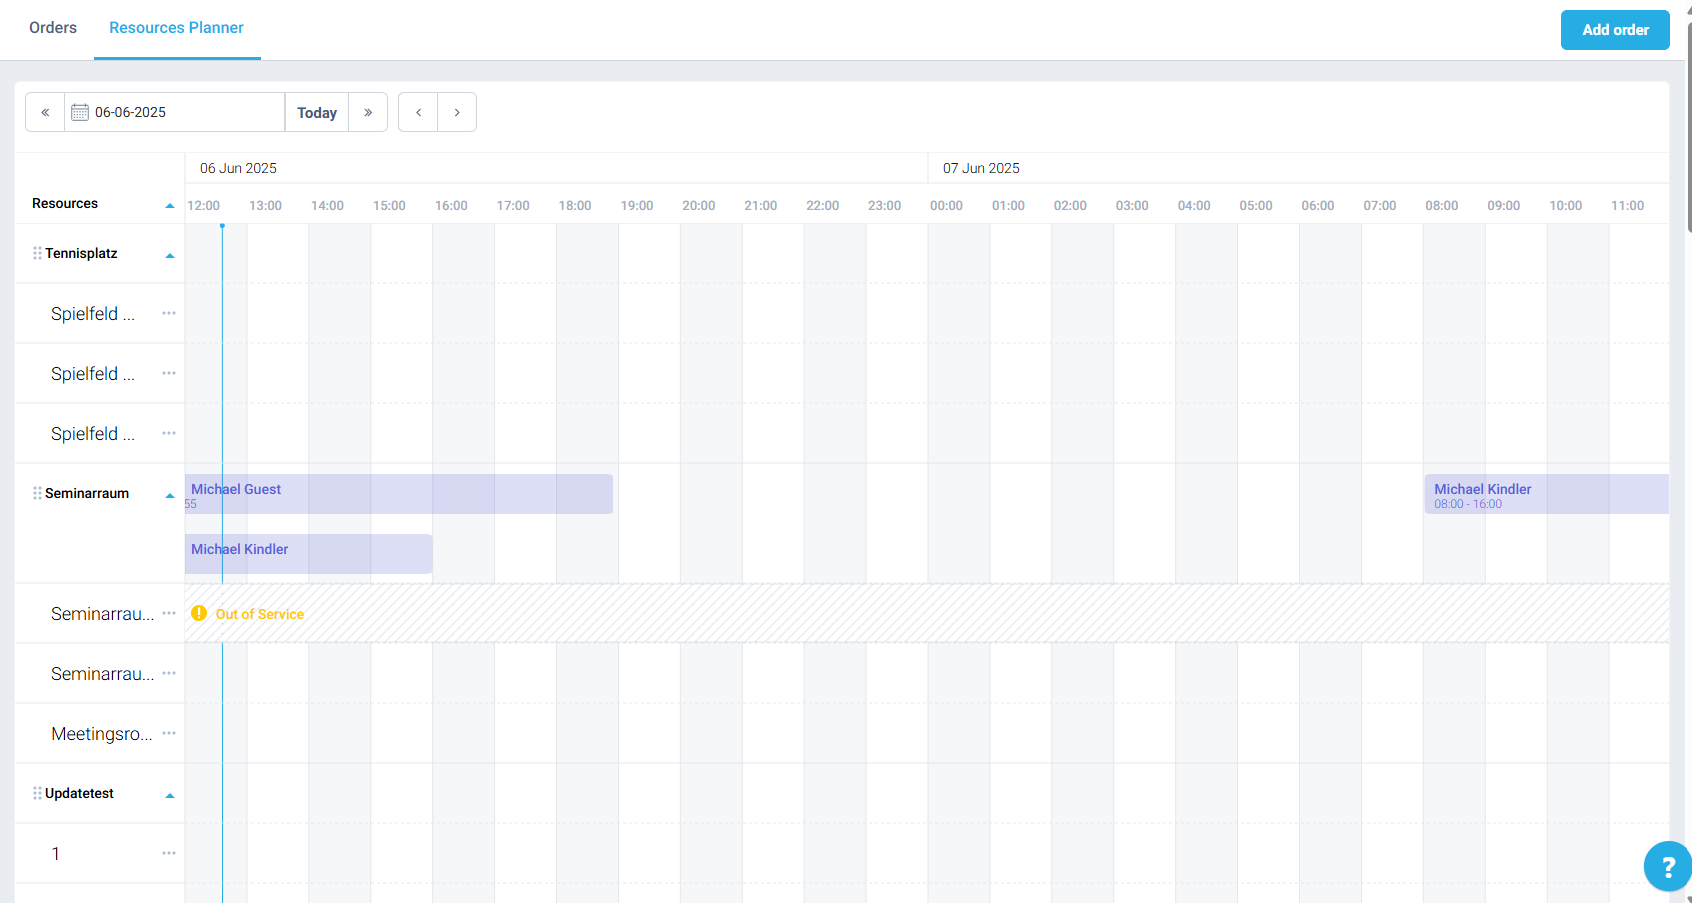
- Click Save to apply the new settings.
Author:

