

How to edit services and set prices
You can create services in the HotelFriend system and offer them to guests across various digital touchpoints. To make a service available for clients, you must assign at least one price to it. Without a price, the service cannot be activated or offered to guests. This guide will walk you through how to view your hotel’s services, edit service details, set prices, and configure additional options
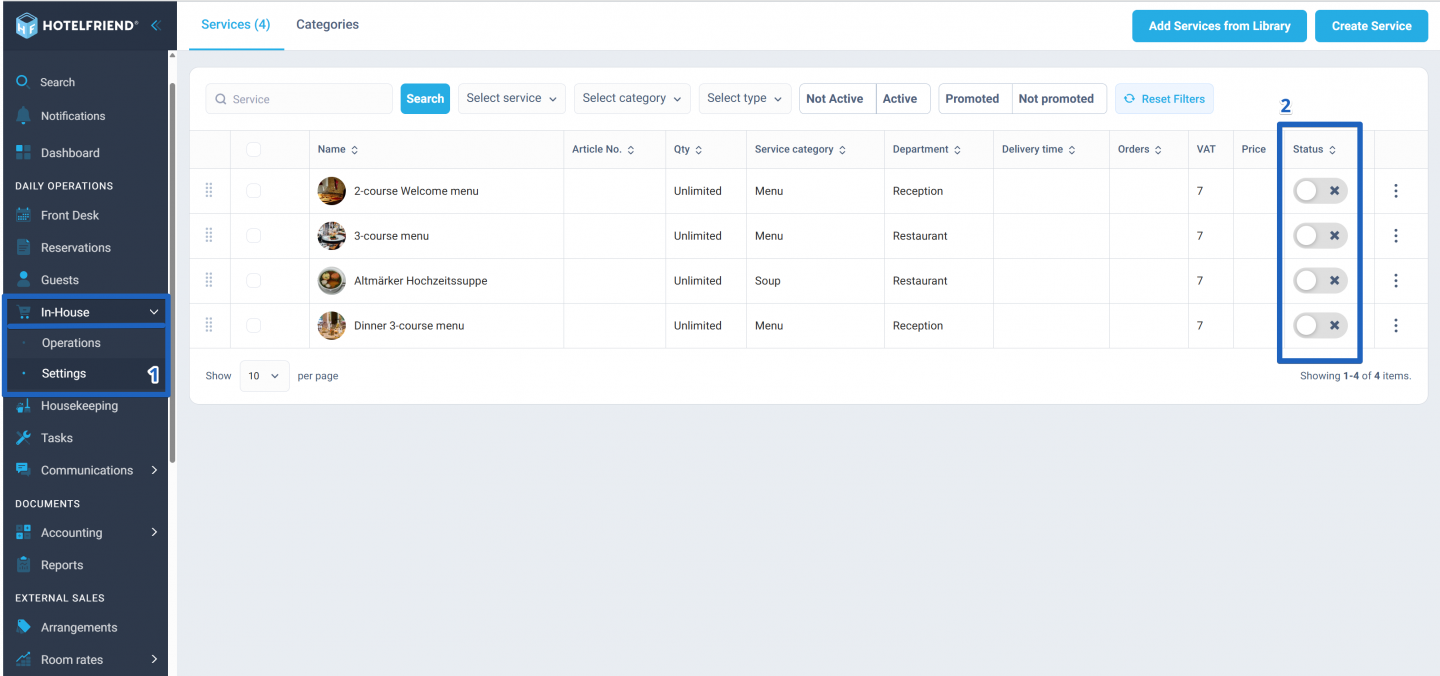
- To see the list of services that your hotel provides, go to the In-House module and select Settings.
- In the Status column, enable the toggle to activate the service. To make the service available, you must specify at least one price.
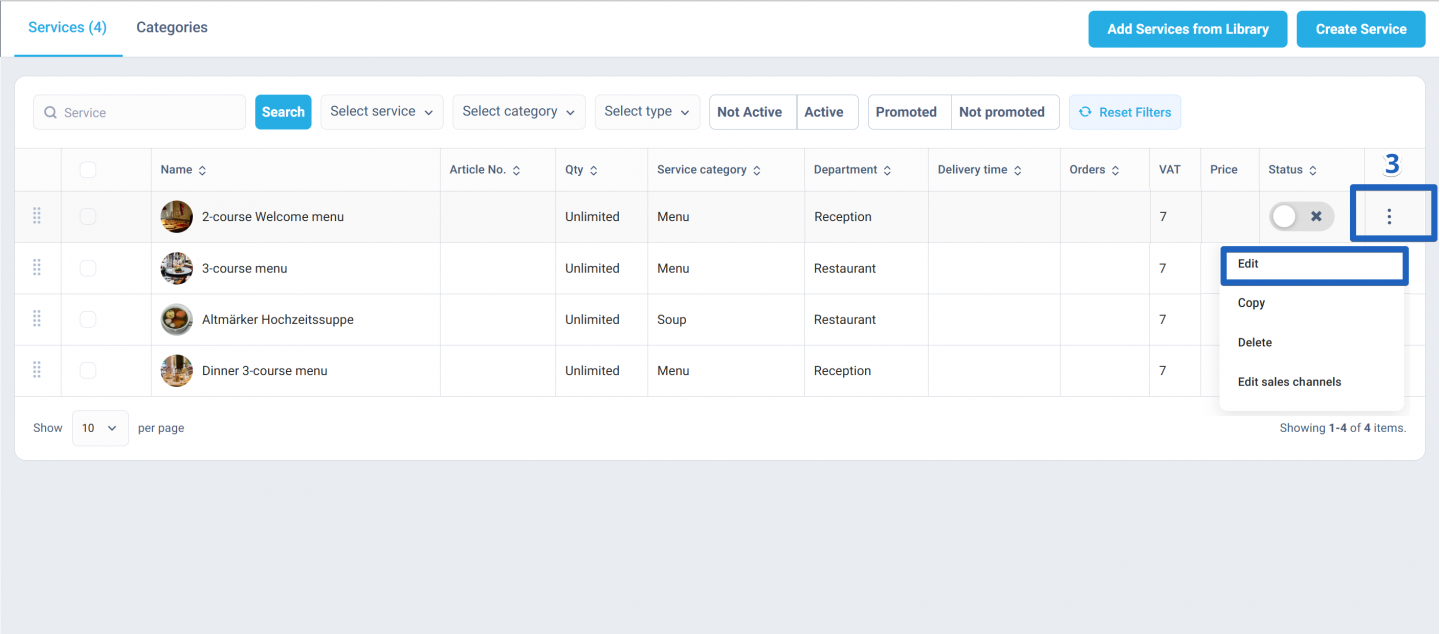
- To set prices and edit a service, click on the settings button and choose the Edit option from the dropdown menu.
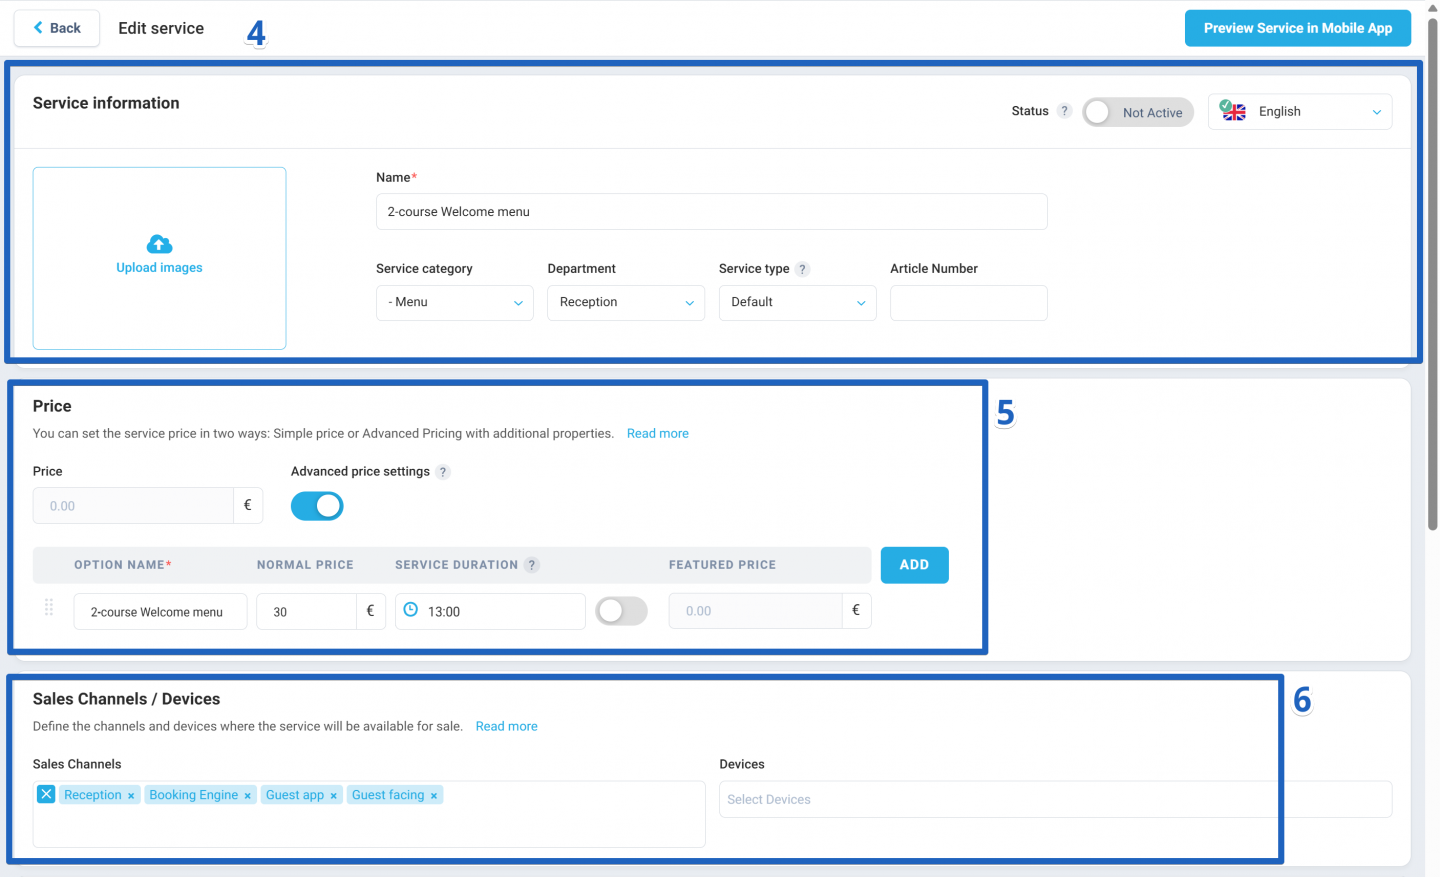
- Now, the Service information can be edited, including the service name, service category, department, availability status, article number, and service images.
- Set the price per service or based on duration. To enable duration-based pricing, switch on the Advanced price settings toggle, where you can enter a custom price.
- Select Sales Channels and Devices from the dropdown list.
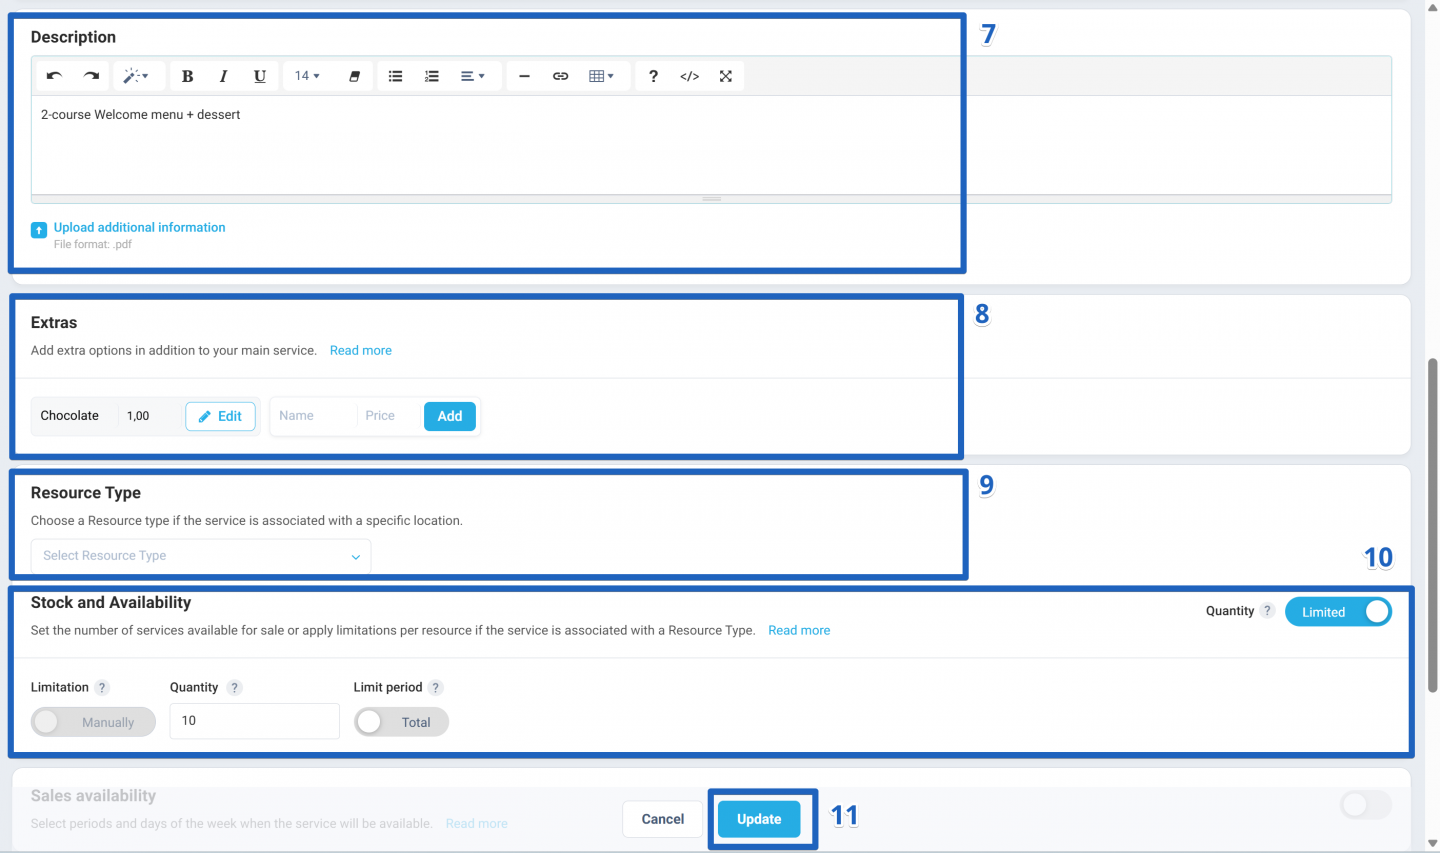
- Add a service description or upload supporting materials in PDF format.
- To set Extras for the service, write the Name and Price for it and press the Add button.
- Choose a new Resource Type from the dropdown list if it needs to be edited.
- To set Quantity limits for your service, switch on the toggle to Limited.
- Click the Update button to save your changes or continue editing the remaining information.
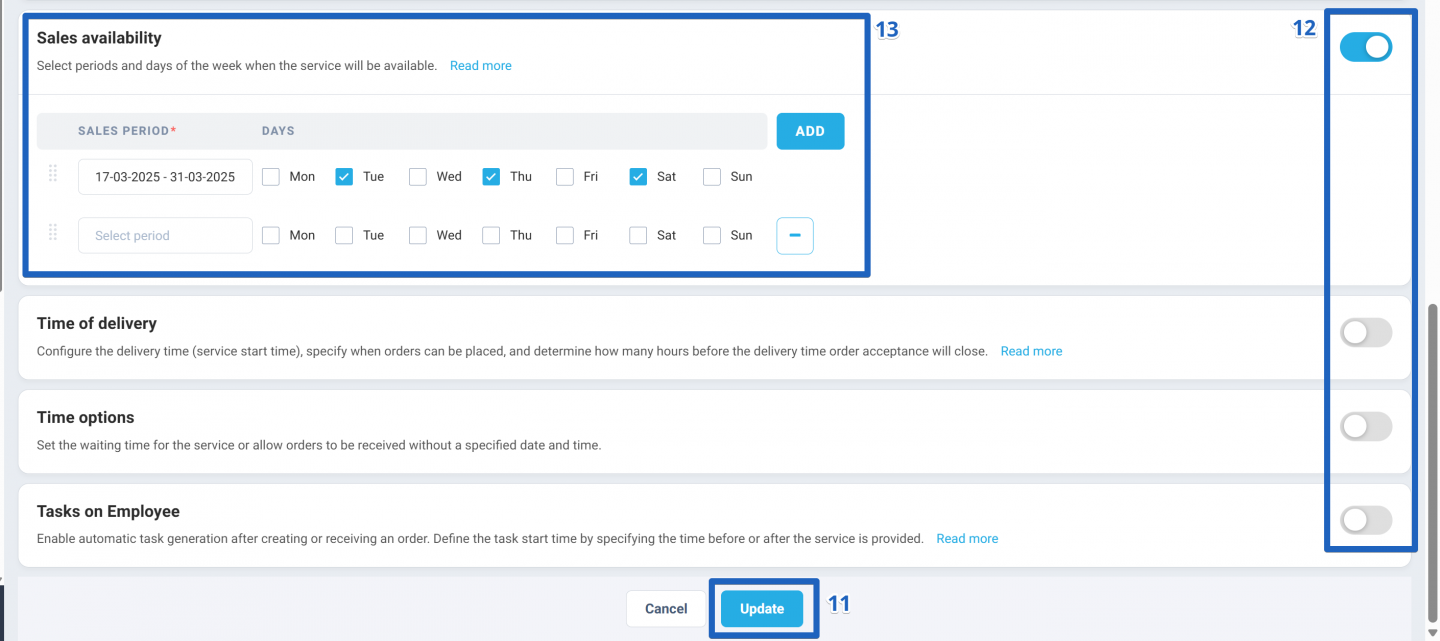
- Activate additional custom settings for the service by enabling the relevant toggles.
- To configure Sales availability, select the sales period from the calendar dropdown, choose specific days, or combine both options. If you need more sales periods, click the Add button.
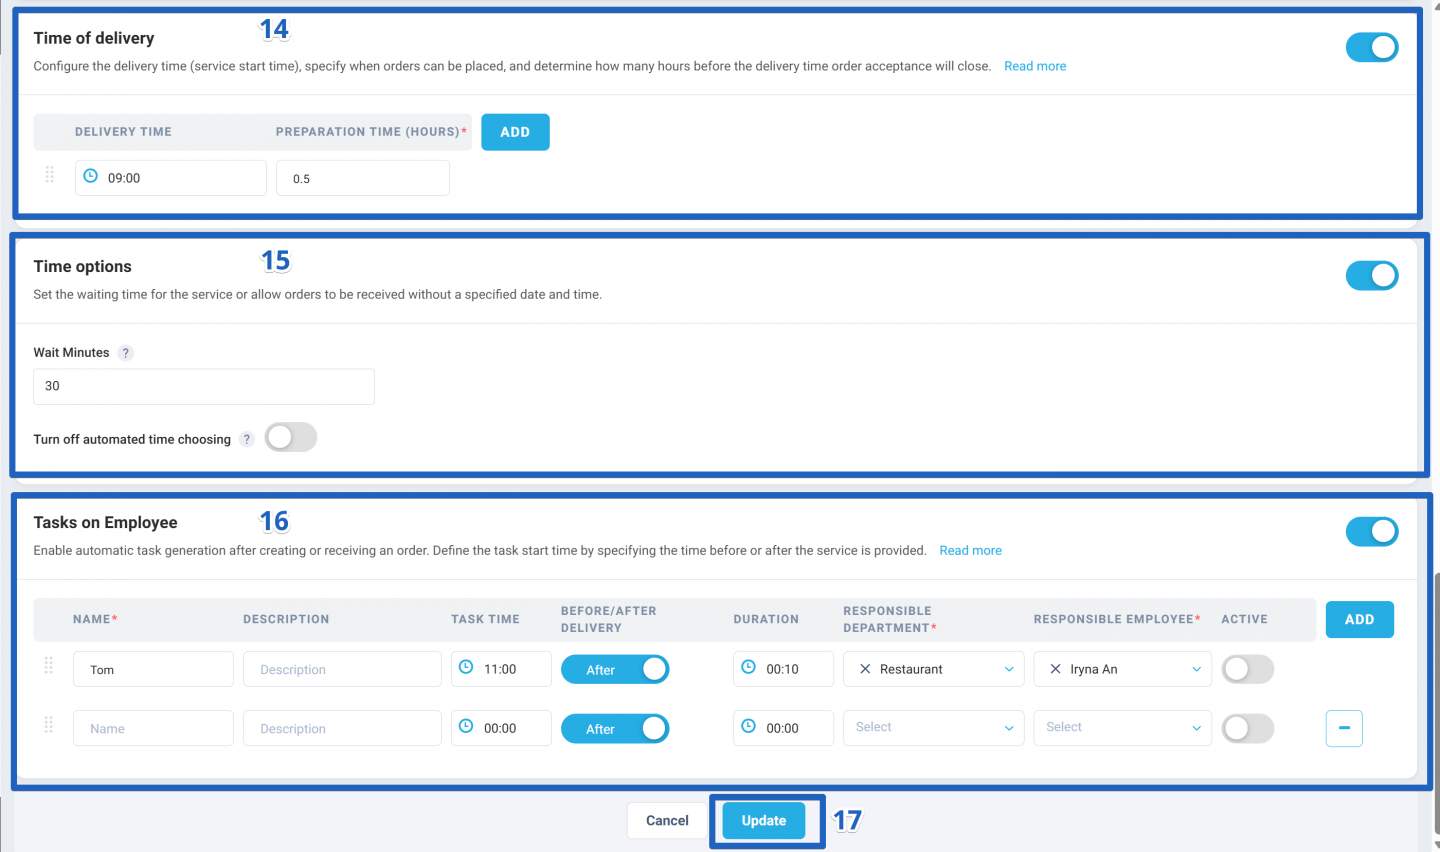
- To specify the Time of delivery, enable the toggle and set the desired delivery and preparation times.
- To configure Time options, switch on the toggle and choose the required waiting time, or disable automated time selection by toggling it off.
- To assign custom tasks to employees, enable the toggle and enter the following details: Name, Description, Task time (before/after delivery), Duration, and the Responsible department/employee. Activate a task by enabling the toggle in the Active column. Add more tasks by clicking the Add button in the Tasks on Employee section.
- Click the Update button to save all changes.
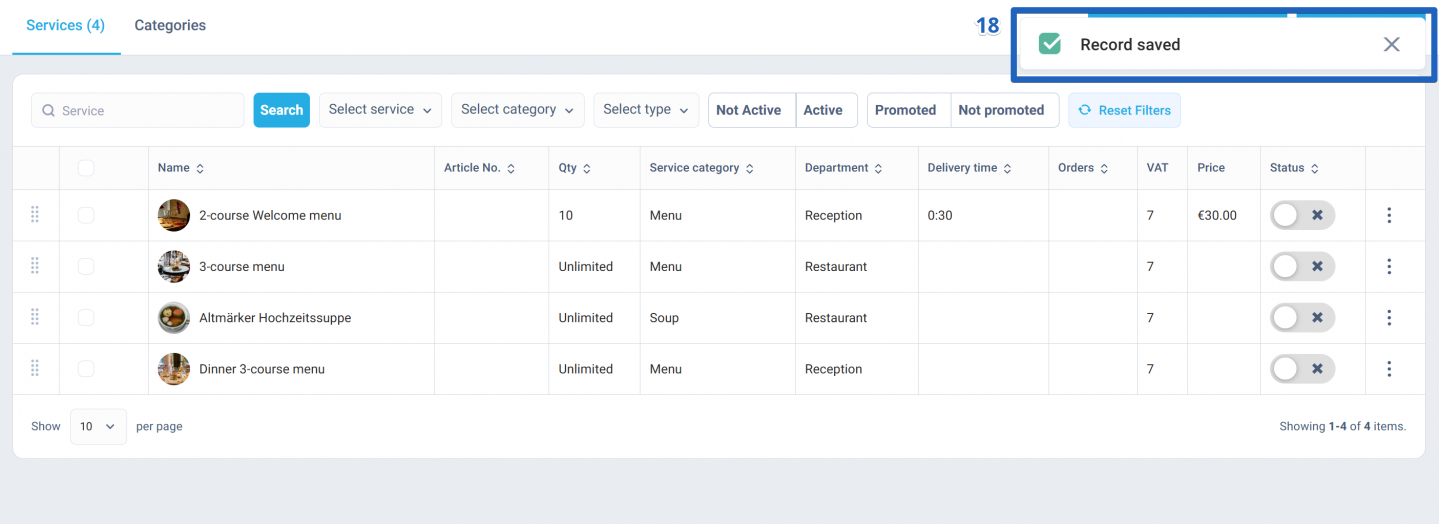
- The service has been successfully updated.
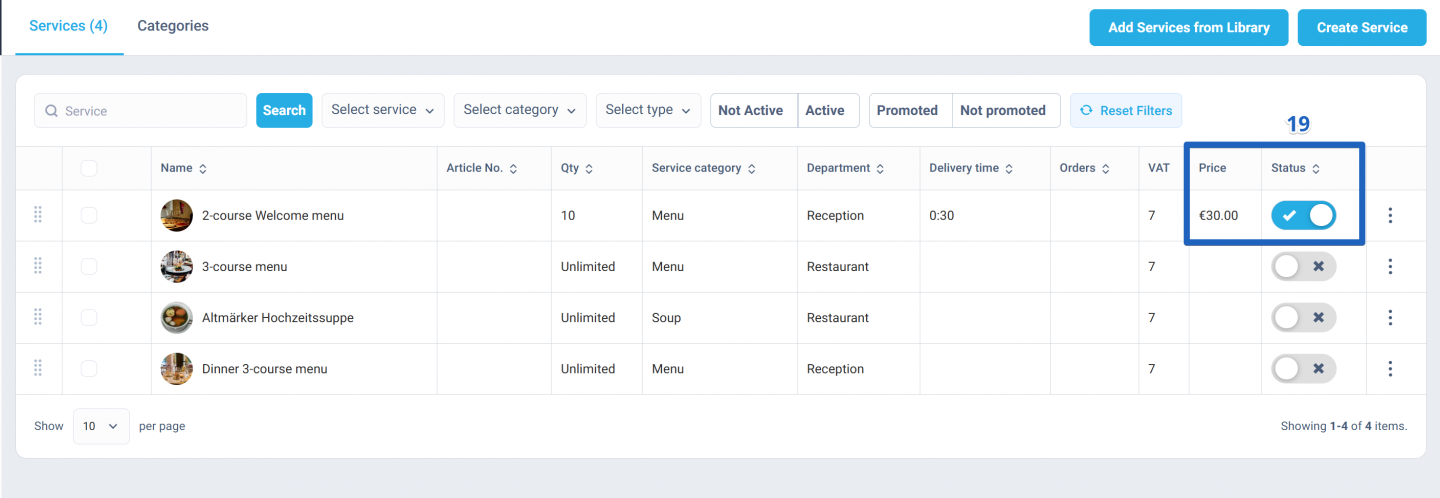
- To activate the service, toggle the switch in the pricing section. The service is now available to clients
Author:

