

How to assign a status to the guest
With 5 built-in statuses available in our hotel management system, you can mark any guest card with the “VIP”, “Blacklist”, “Regular guest”, “Top buyer” and “Honeymoon” labels. A corresponding icon will be displayed just near the guest’s name so that you can quickly identify if the guest is banned or belongs to the VIP category.
To assign a status to the guest, follow these instructions:
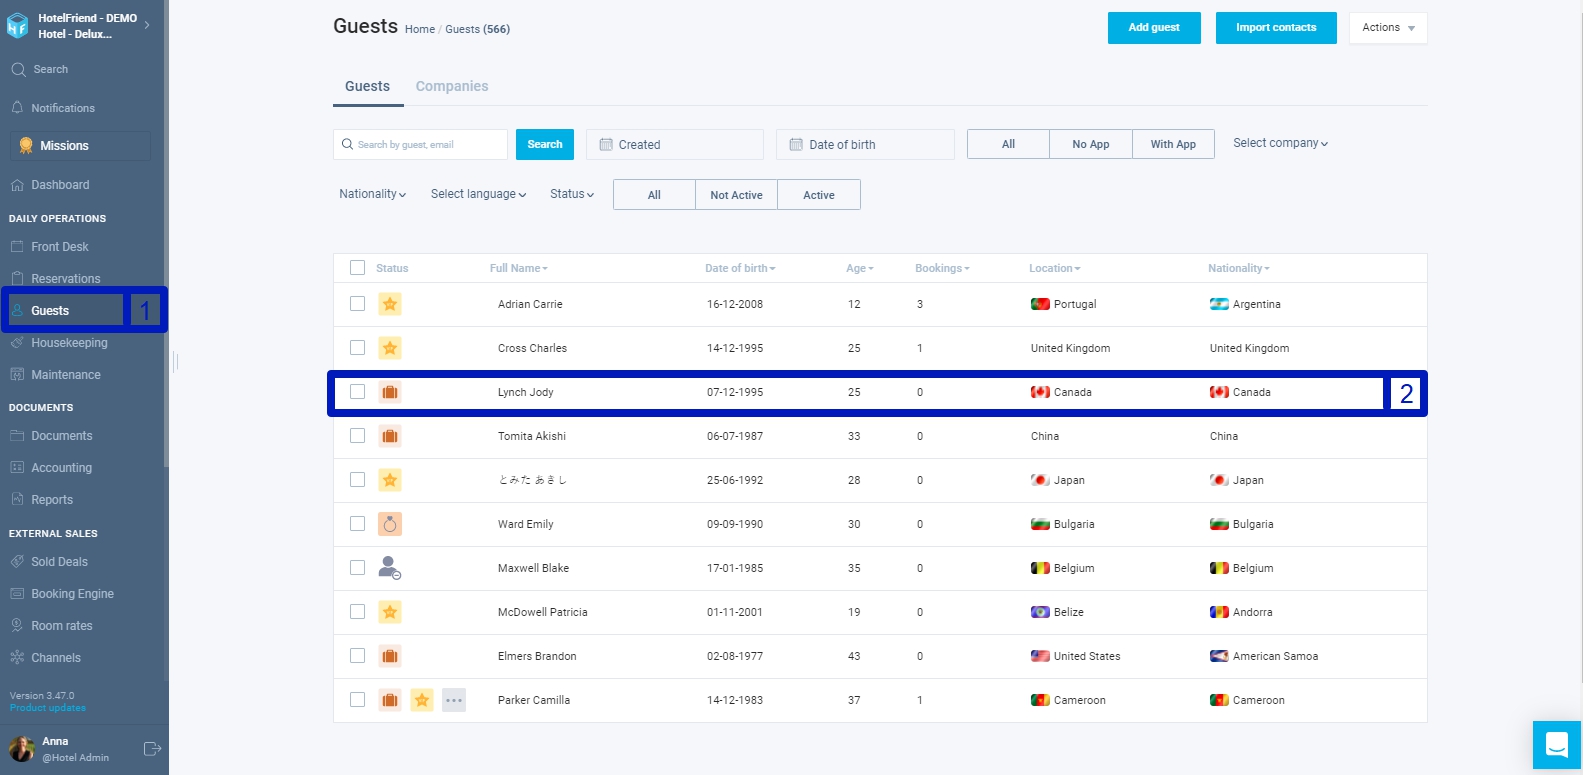
- First, choose the “Guests” module in the menu on the left;
- Next, open the guest’s card, which contains detailed information about the guest;
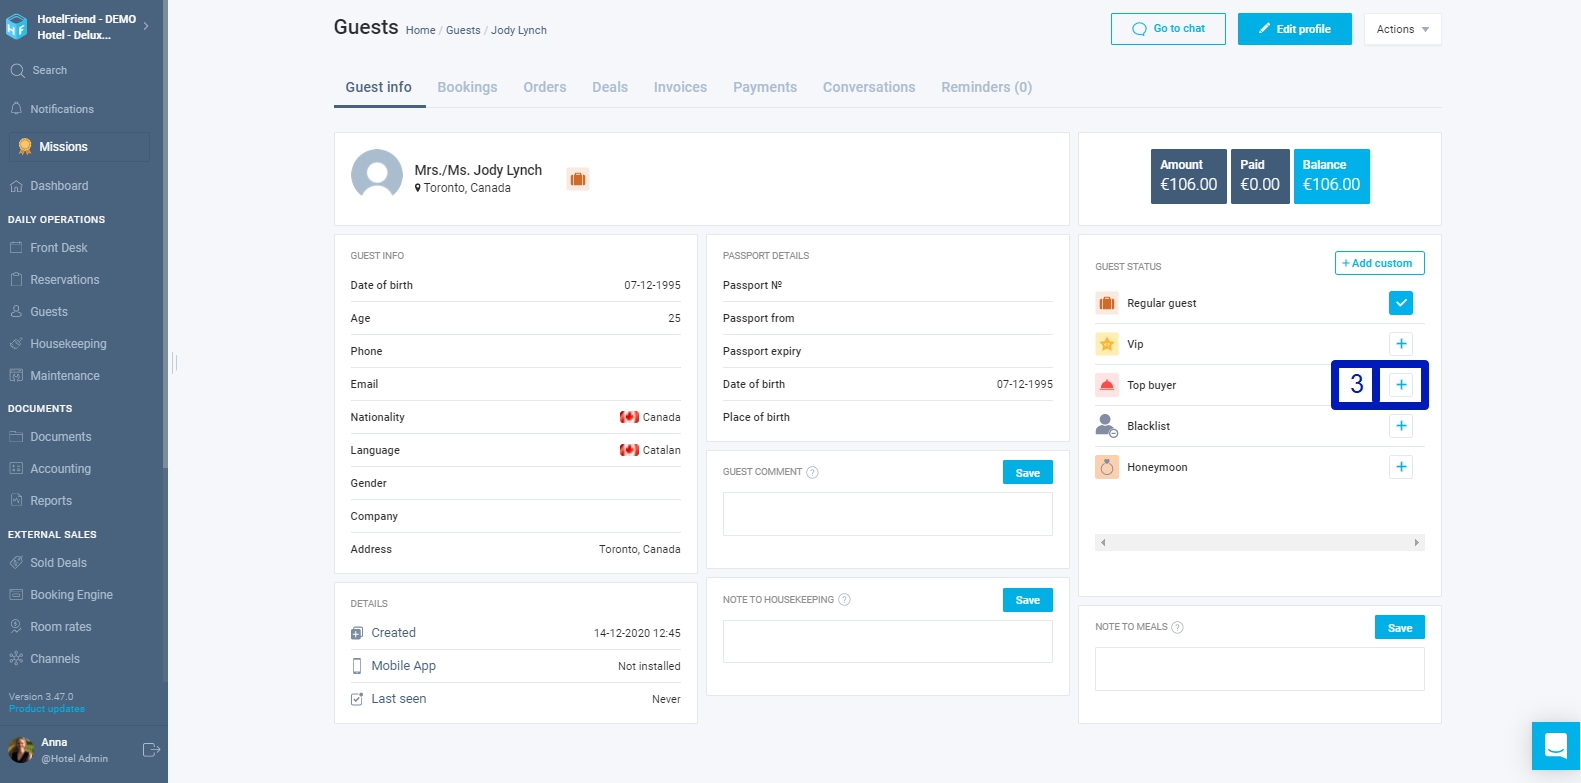
- Then, hit the “+” button near the appropriate status in the “guest status” section;
- Finally, check whether the newly assigned status is displayed near the name of the guest.
How to assign a custom status to the guest
If you want to create your own labels and add them to the system, follow these simple steps:
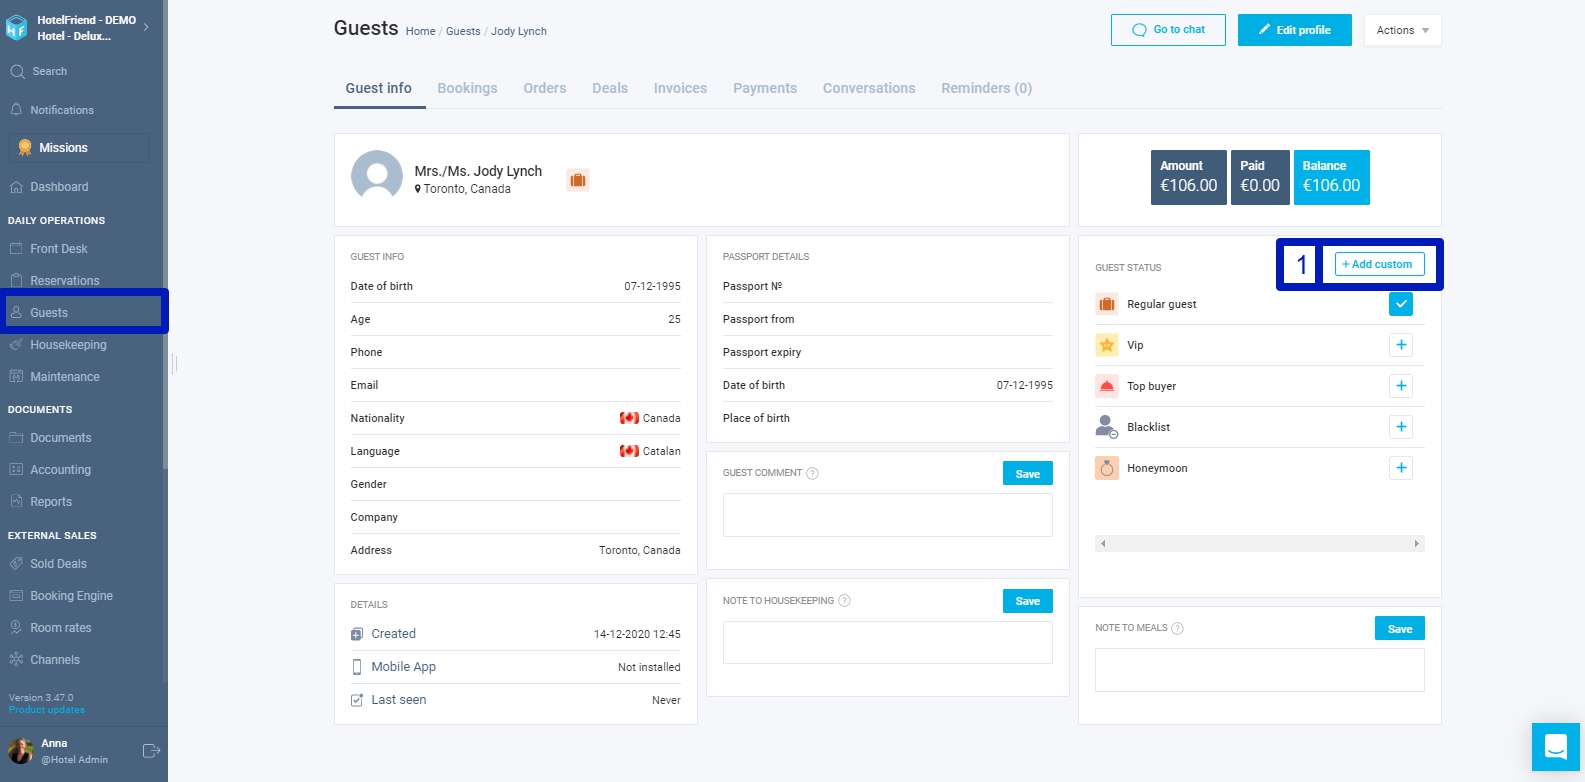
- First, click the “+Add custom” button, which can be found in the guest card;
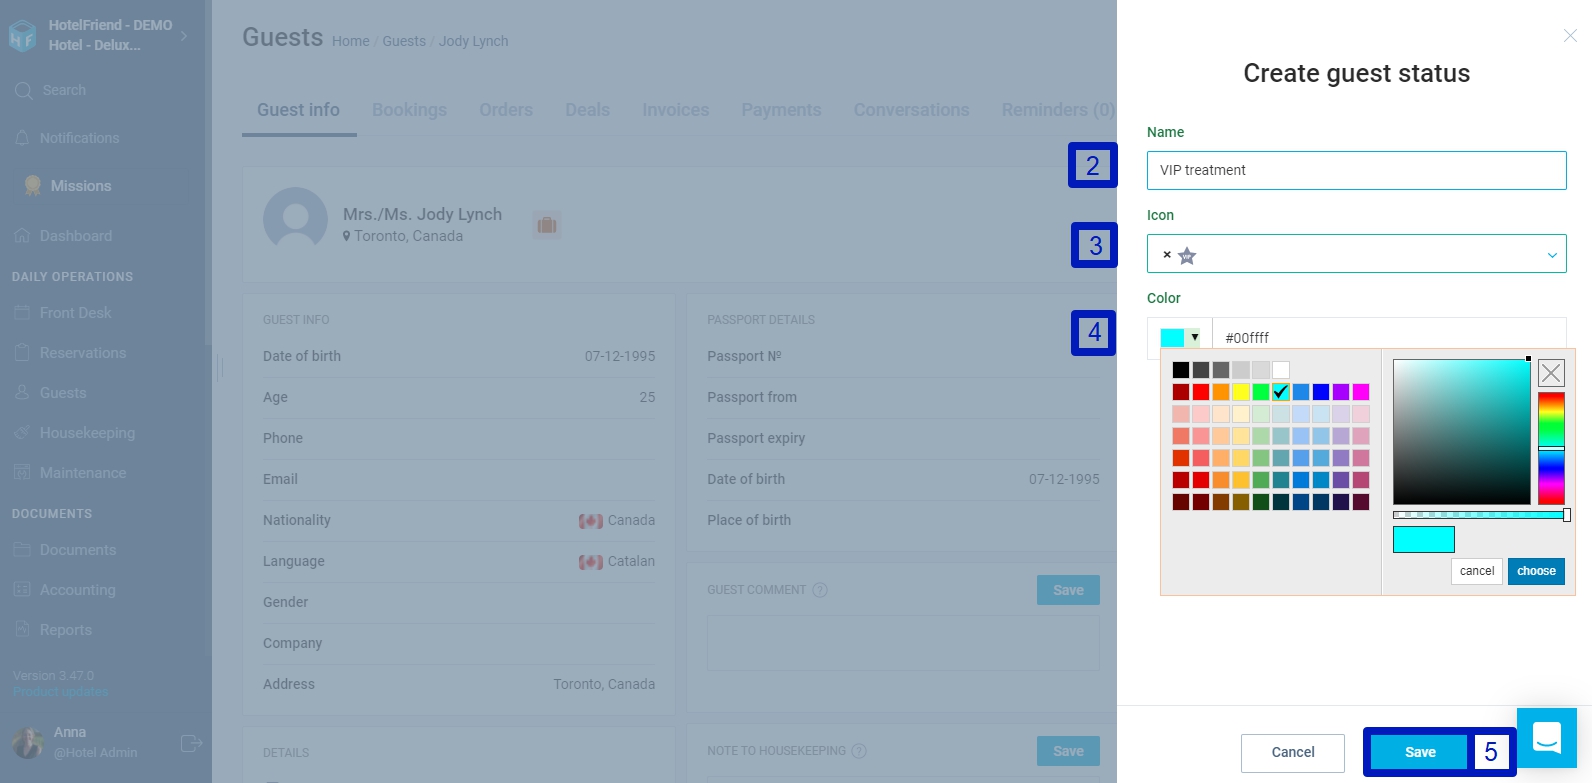
- Then, write the name of the new status in the “Name” field;
- Next, add a corresponding icon in the “Icon” field;
- After that, choose the color of the icon in the “Color” field;
- Finally, click “Save” to save all changes.
Guest management becomes much easier with an opportunity to assign a status to the customer. With this feature, you will be able to quickly identify the type of guest and create your own system of labels.
Author:

