How to set up Cash books
The Cash books module records all cash movements in your property. You can create multiple cash books — for example for different locations or registers — and manage them across defined time periods. Go to Documents → Cash books to get started.
This is how to set up the Cash books module
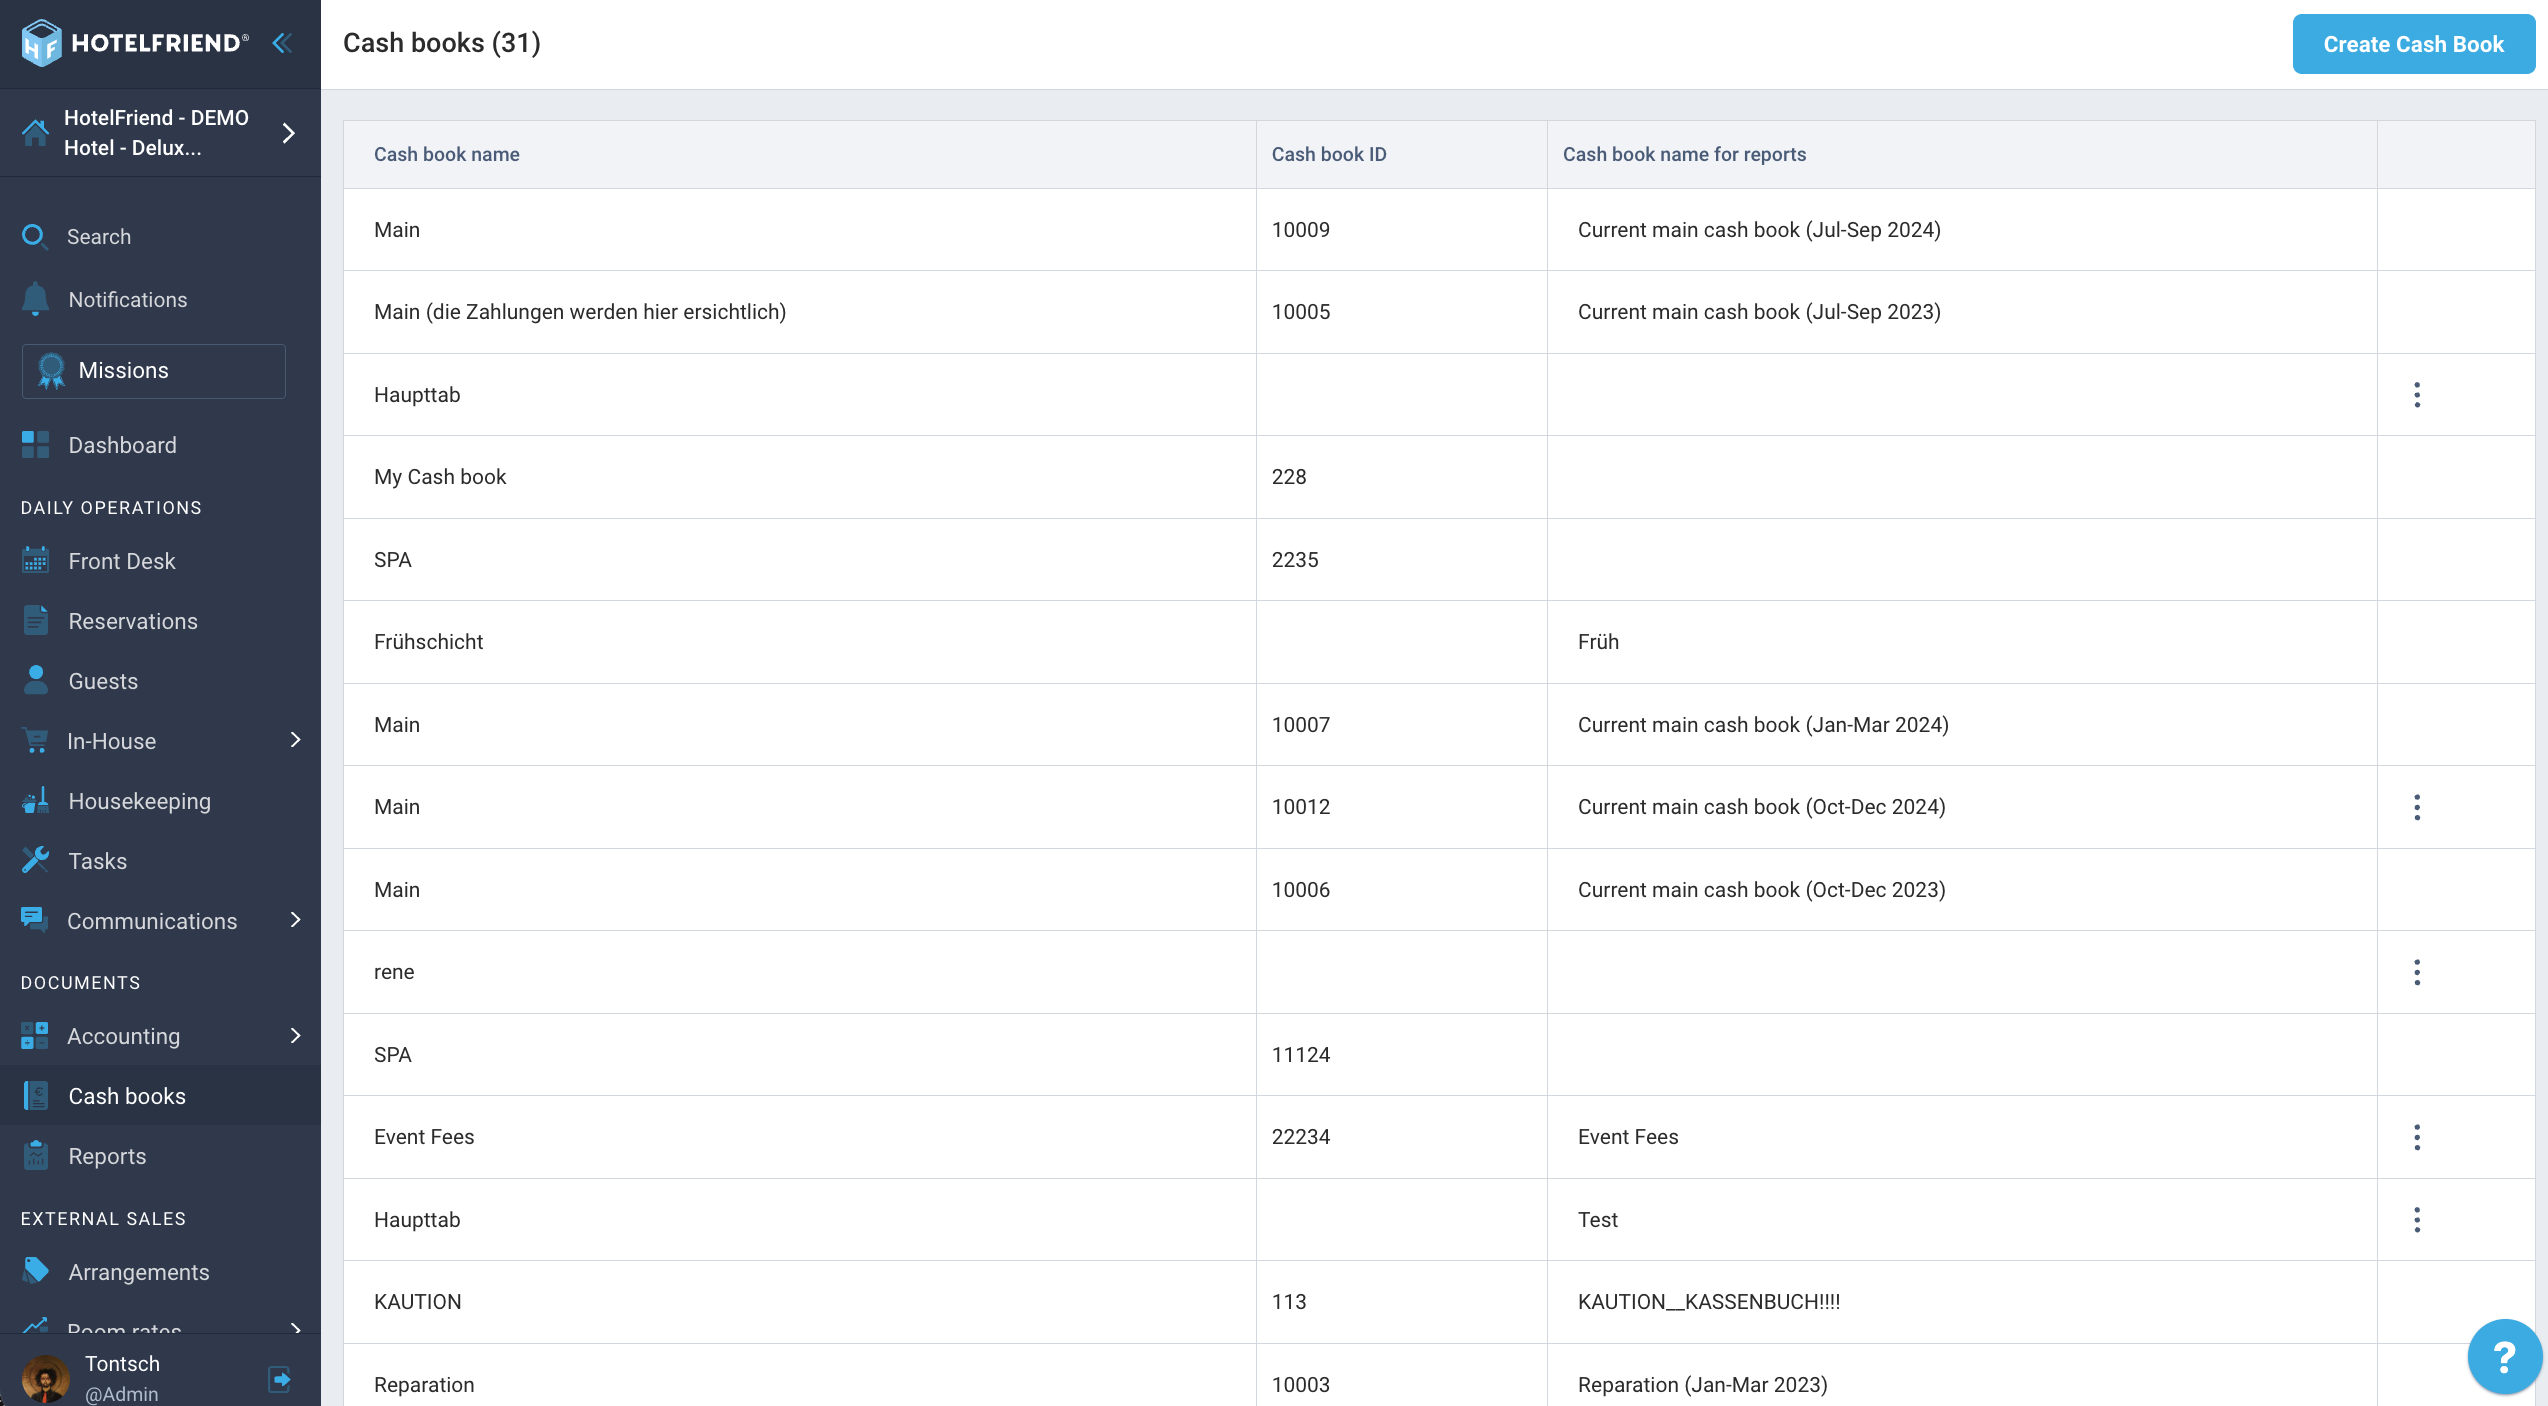
- Navigate to Cash books. Open the left navigation menu and go to Documents → Cash books. You will see a list of all existing cash books with their name, ID, and report name.
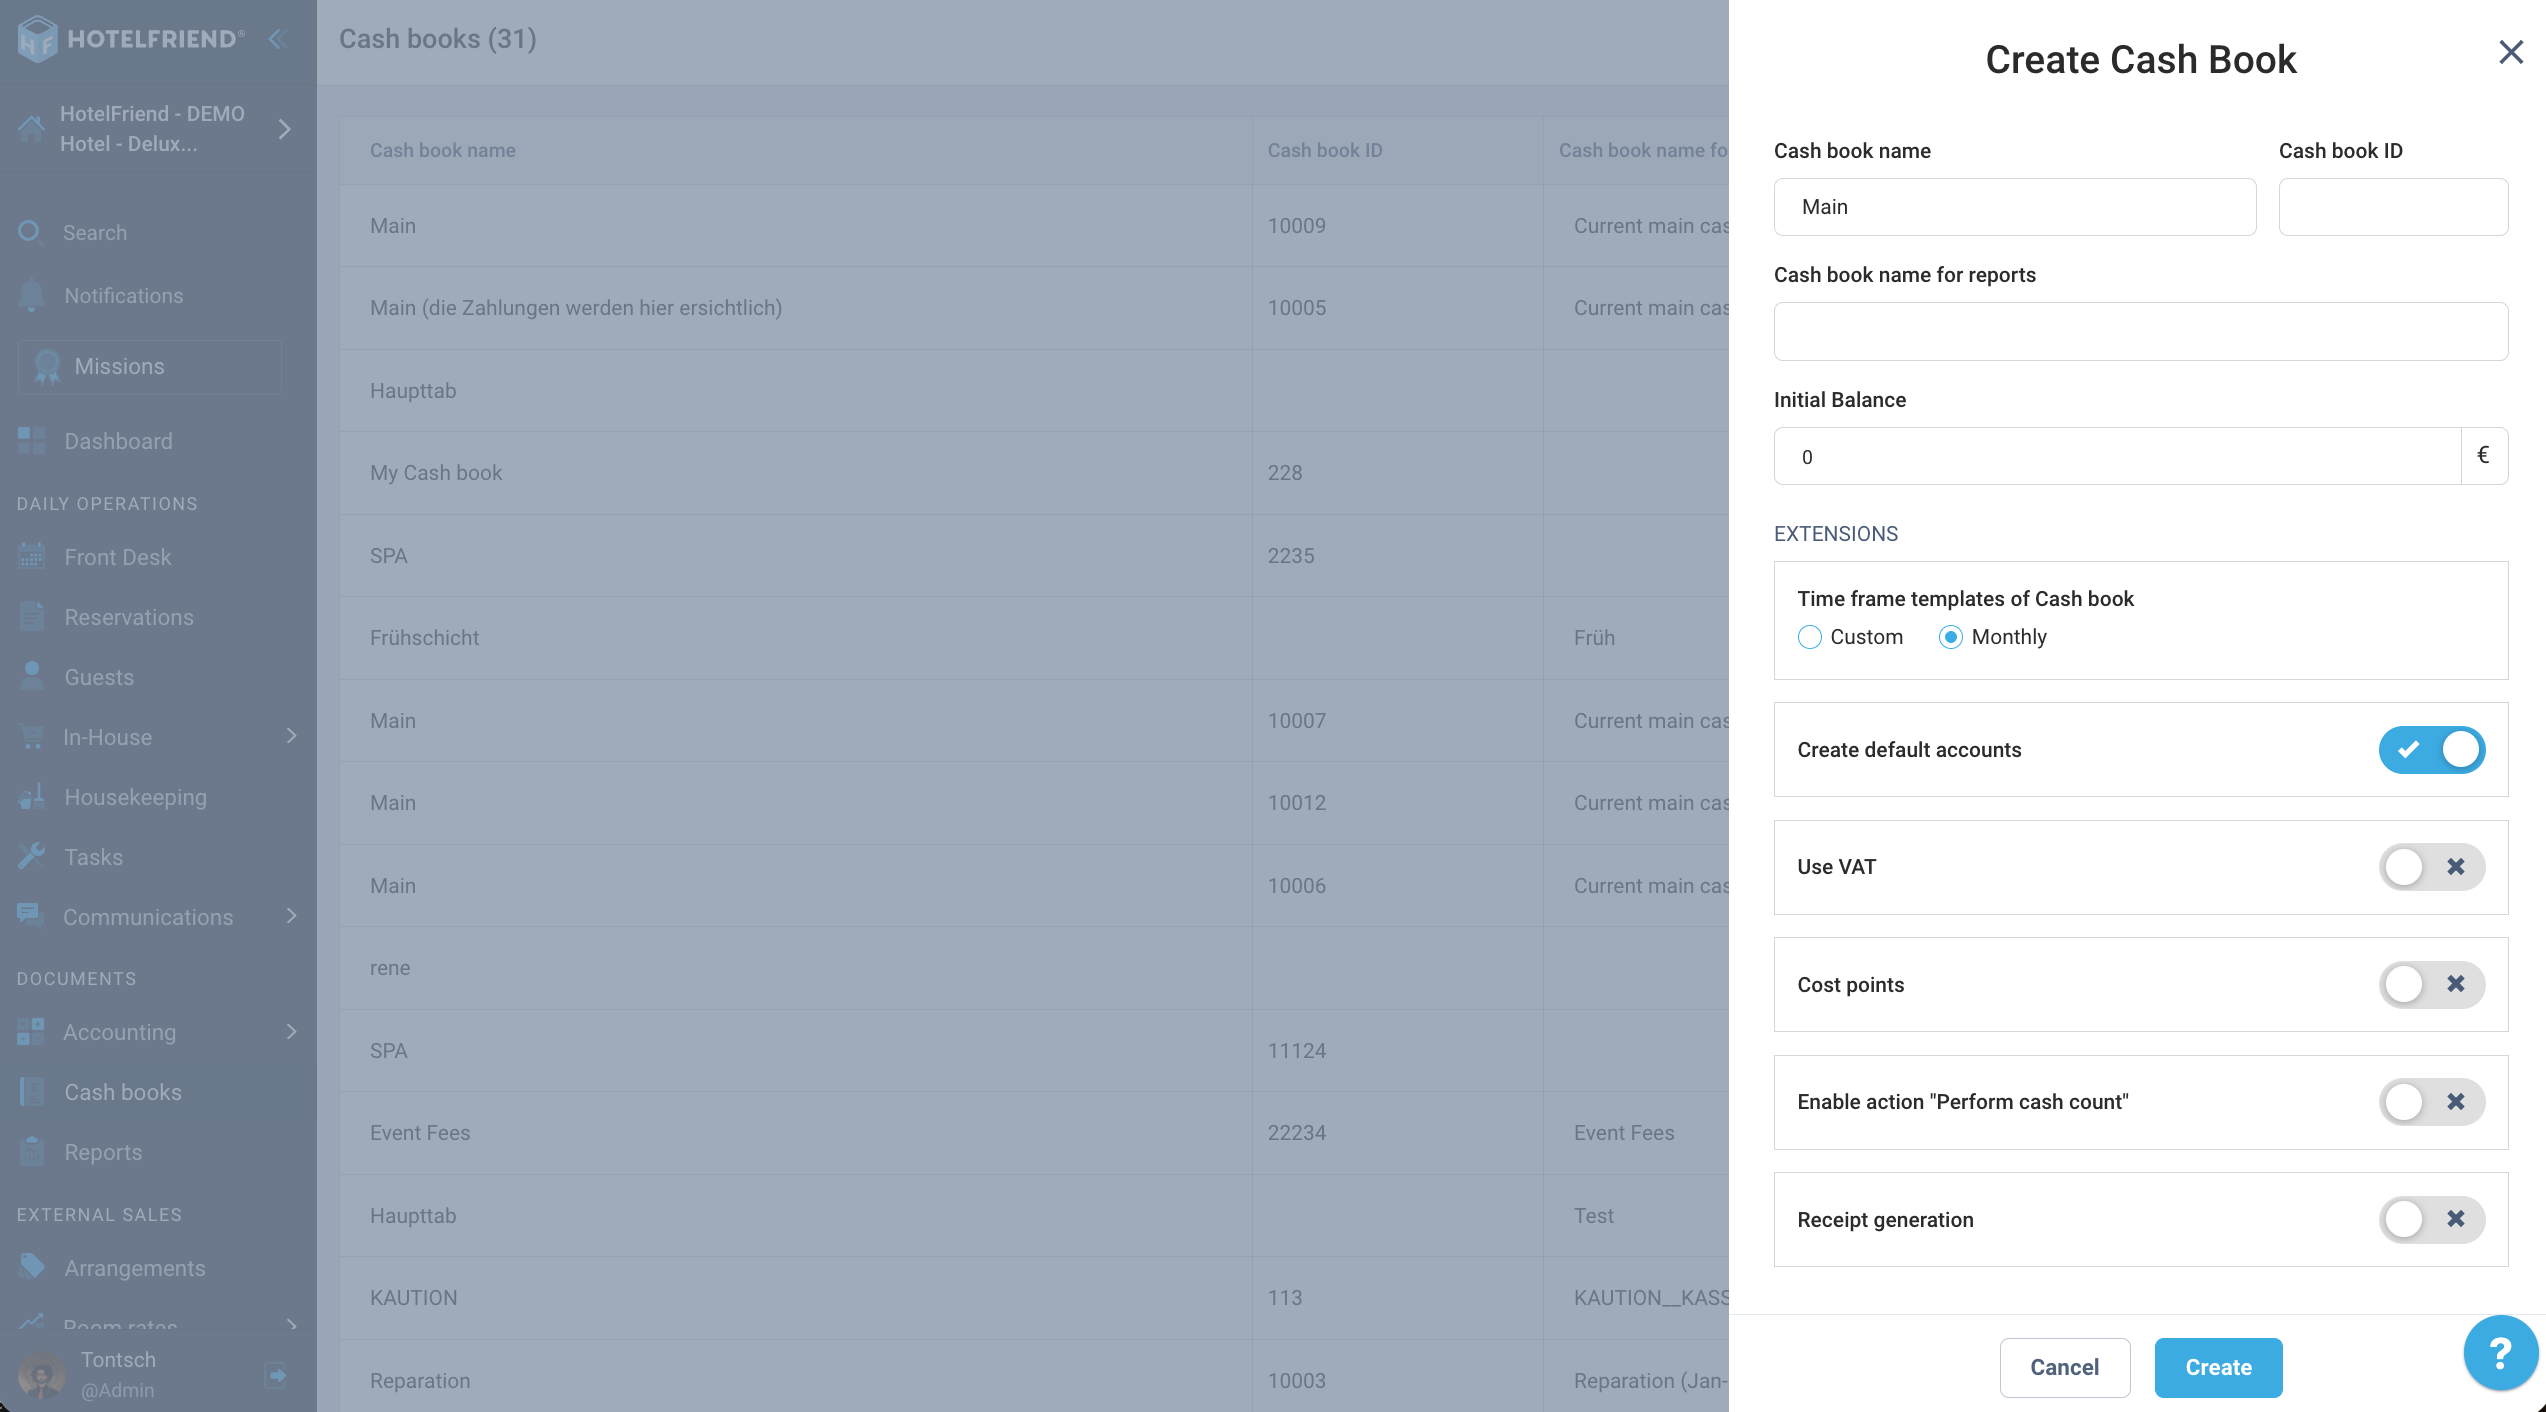
- Create a cash book. Click Create cash book in the top right corner. Fill in the following fields:
- Cash book name — The internal name of the cash book (e.g. "Main register").
- Cash book ID — An optional external reference number.
- Cash book name for reports — The name that will appear in reports.
- Opening balance — The starting cash amount in EUR.
Under Extensions, you can activate the following options:- Time frame templates — Choose Monthly for automatic monthly periods, or Custom to set periods manually.
- Create standard accounts — Automatically creates booking accounts for this cash book.
- Use VAT — Enables VAT rate selection when recording transactions.
- Cost positions — Allows assigning cost centers to transactions.
- Enable "Perform cash count" action — Unlocks the cash count feature for period reconciliation.
- Receipt creation — Enables automatic sequential receipt numbering.
- Manage time periods. Click on a cash book to view its periods. Each period covers an accounting interval (by default one month) and shows its name, start date, end date, and whether it has been closed. Use the ⋮ button at the end of a row to edit or delete a period. The Settings button at the top right lets you update the cash book configuration at any time.
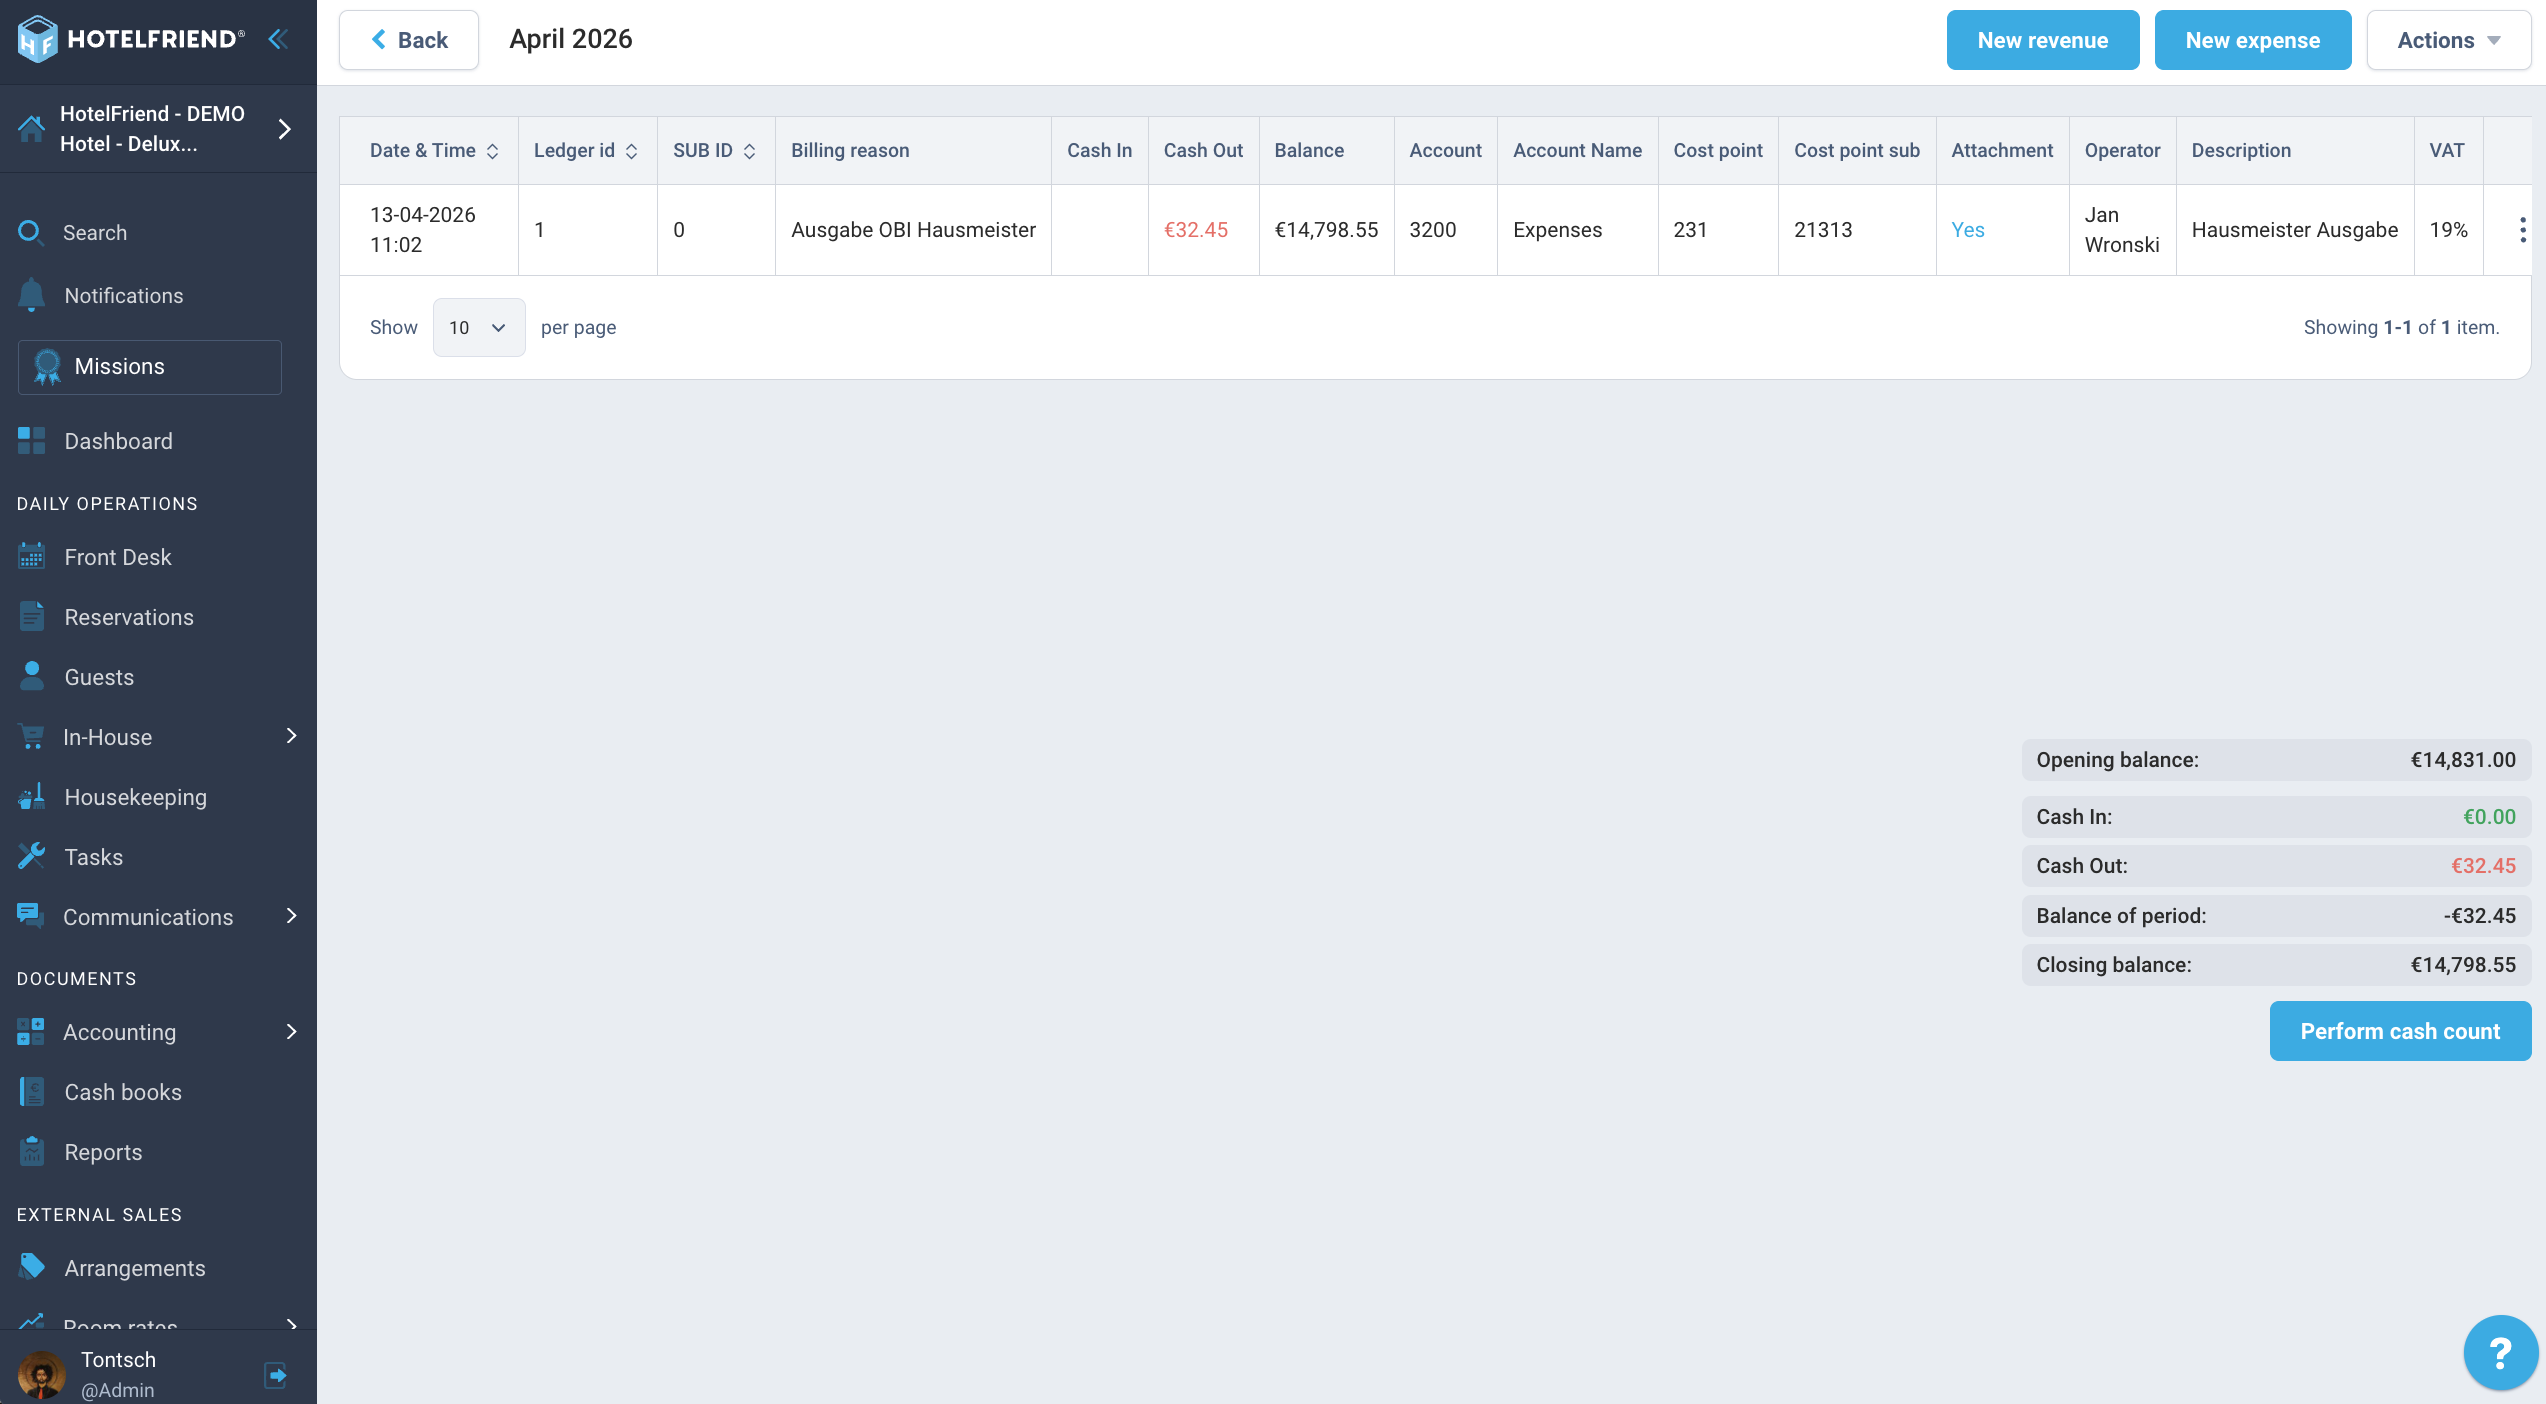
- Record transactions. Click on a time period to open the transaction view. Use New deposit or New withdrawal to record a cash entry. For each transaction, fill in:
- Date / Time — Pre-filled automatically; adjust if needed.
- Reason — Select a reason from the predefined list.
- Account — The booking account for this transaction.
- Amount — The deposit or withdrawal amount in EUR.
- Cost center — Optional cost center assignment.
- VAT — VAT rate (if the option was activated).
- Description — Free text field for additional notes.
- Upload receipt — Optionally attach a PDF, JPEG, or PNG receipt.
The right-hand summary panel shows the period totals at a glance:- Opening balance — Starting amount at the beginning of the period.
- Deposits — Total cash in (shown in green).
- Withdrawals — Total cash out (shown in red).
- Period balance — Net result of deposits minus withdrawals.
- Closing balance — Current total cash in the register.
- Perform a cash count. At the end of a period, click Cash count (bottom right of the summary panel) to enter the actual cash on hand and reconcile it against the system balance. This feature must be enabled in the Extensions section when creating or editing the cash book.

Author:
